Monday, January 13, 2014

Butterfly Shadowbox Frame

Wish I could say this was my original idea, but, it's not.  I saw something similar on a Facebook page and adapted Toni Arthur's idea for a frame I had on hand.

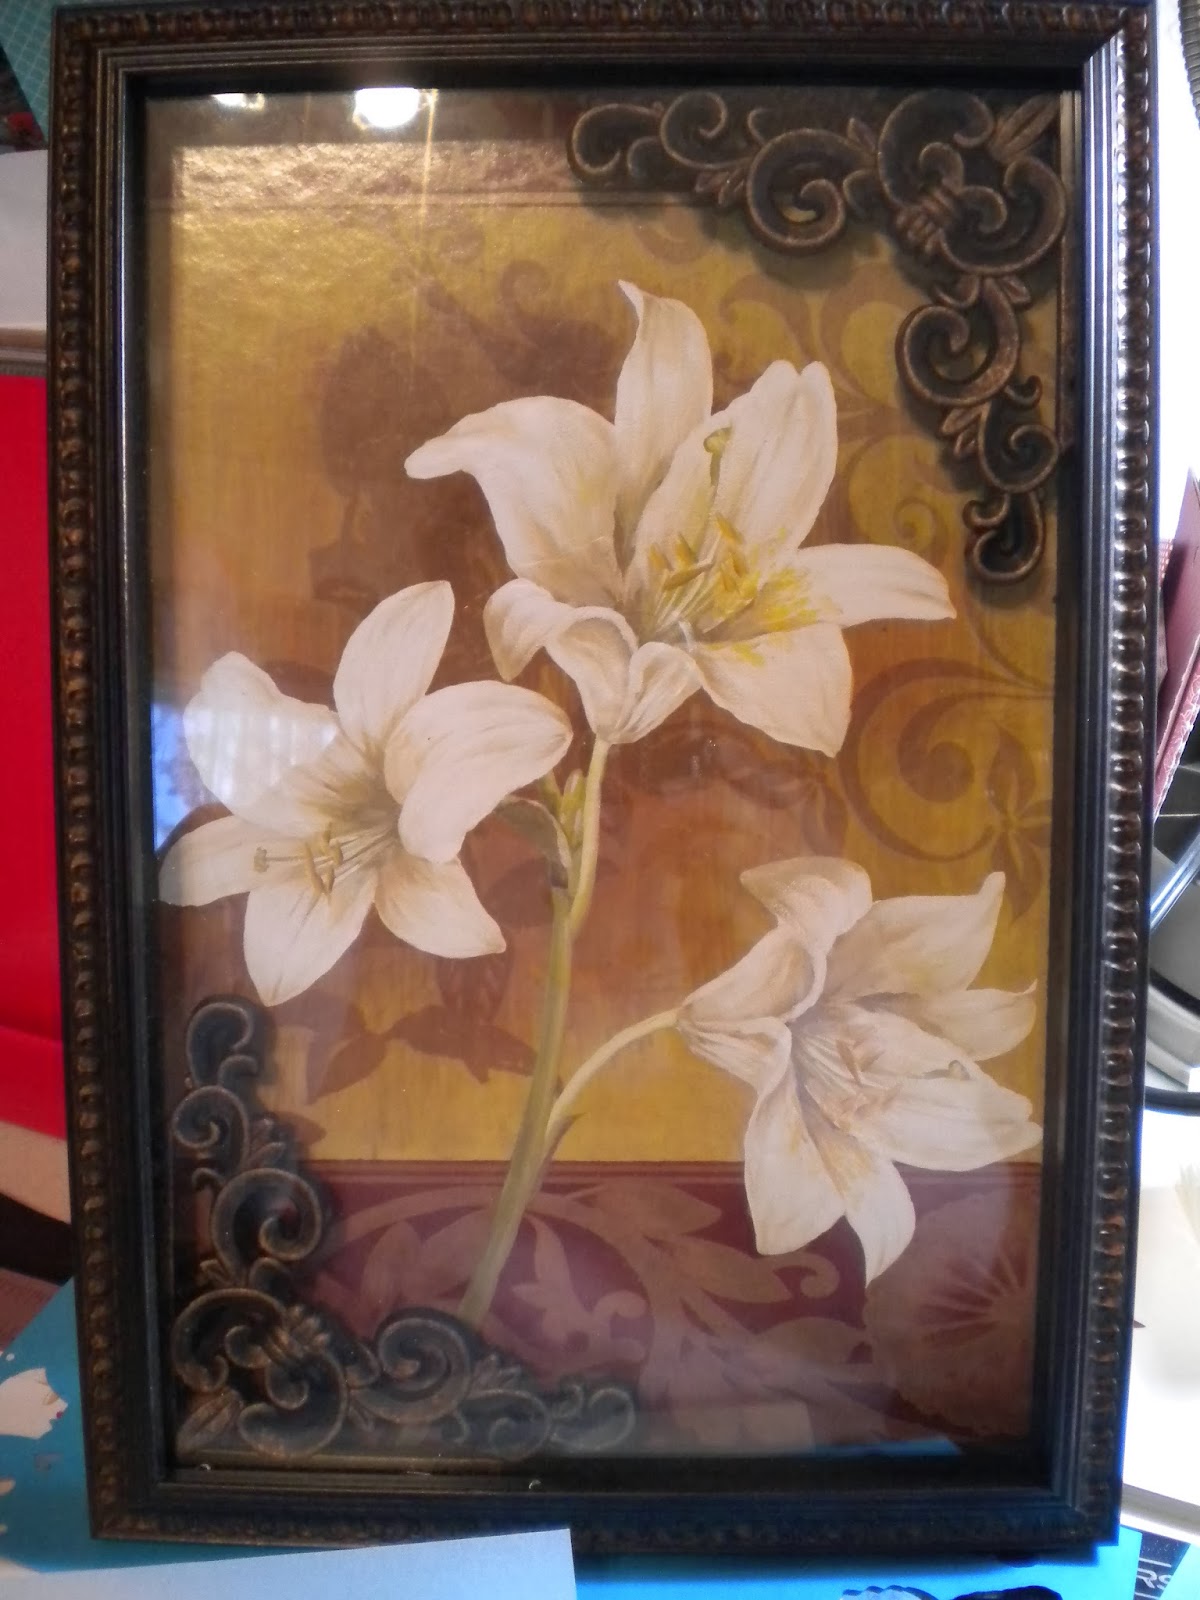
Our local Dollar General Store had these framed pieces of "art" for only $6.00.  I liked the scroll work in the corners and since the frame sits about 3/4" from the picture, I took it apart and treated it as a shadowbox.


I covered the art work with a piece of pretty Tim Holtz paper using my ATG gun and double sided tape.  The branch was clipped from a tree in our front yard.  It had to be trimmed a bit to position it just where I wanted it inside the frame.


 Once I was happy with where it was situated, I used an awl and punched a hole on either side of the branch and threaded some paddle wire through the holes to secure the branch in place.

Twisting the wire on the back to keep it in place made me remember all those toys the grandkids opened at Christmas.  One year, it took at least 10 minutes to get a Barbie doll and all her accessories off the cardboard backing---while an excited 5 year old was bouncing up and down in anticipation of playing with it!

The pink pieces of paper indicate where the wires were attached.


The butterflies were punched from vellum and mounted on a matching punch out of white cardstock. I used some glue dots and some pop up glue dots to attache the white cardstock punchouts onto the background and vellum adhesive on the overlays.   The wires were covered by three of the butterflies. 

I used a Cuttlebug die and folder, Martha Stewart punch and an EK Success punch for the butterflies..

This was made for my main bathroom but I have a feeling when my friend, Leonna, sees it, she'll wind up owning it.  She loves butterflies more than I do!


Sunday, January 12, 2014

Stampin' Up Inspired Card

A Stampin' Up demonstrator pinned a card similar to this on Pinterest.  I like the sentiment she used so I printed it in my card making software.  Then I added a couple of flowers punched with an EK Success punch and a pretty brad from Eyelet Outlet.


I believe I prefer the second version better.  No flowers and I dropped one of the pennant shapes down a little lower.


Saturday, January 11, 2014

Sunshine Card

The umbrella is a piece of free clip art that I imported and cut in Make The Cut software.  The flower is made from layers of scalloped circles punched from an old book page.

Love U Card

Renee Wayland and her sweet sister drove to Ada and Shirley and I introduced them to our favorite LSS, Scraptopia.  While we were shopping, I noticed a roll of printed tissue paper by Tim Holtz.  The roll was huge so Renee and I divided it.  I used the tissue paper for the background on this card.

The original card is from Miriam's blog Cards and Scrapping.  She's a Stampin' Up demonstrator from another country and I can't read a single word of her posts! lol!

I've been using my Cameo for almost a year and today's the first time I've had any issues with it.  Guess it doesn't like inactivity and resented not being used for over six weeks.  I had a 12 x 12' sheet of cardstock on my mat and it decided to only cut half the images.  After messing around with the blade, etc. for several minutes I gave up and put a new blade in and it's cutting just fine now.


It's Been A Long Month!

There is a very good reason why nothing has been posted on here since my automated posts on Christmas Eve.  And, they wouldn't have posted if I hadn't set them up several weeks ahead.  My husband had a serious fall on December 10th and just got home from the hospital and rehab yesterday.

I spent the last month driving back and forth to Midwest City to the skilled nursing facility where he received his physical therapy.  It seems like I met myself coming and going.  There was no time or energy to make any cards at all.

He's doing quite well so I sneaked back into my craft room to make a thank you note for the staff at the care facility.  Guess card making is like riding a bicycle.  It was a slow start but I managed to get this done. 

The colors don't show up well in the photo.  They truly do match! lol!  As soon as the Pearl Pen dots dry on the flowers, I'll jot a note inside and get it sent off.

Tuesday, December 24, 2013

Etched Casserole Dishes

These are Anchor Hocking casserole dishes that I etched with my blasting cabinet.  I made these for my nieces' Christmas gifts.


Almost Floating Frames

A holiday catalog inspired me to make these frames.  Since floating frames are rather expensive, I decided to just make my own.

All these frames came from either the Dollar Tree or Dollar General Store.  The largest is 8" x 10" and the smallest is 4" x 6".  I removed the cardboard backing and then put a line of hot glue around the edge of the glass on the back side to hold it in place.

The issue with removing the cardboard backing was that also removed the metal hanging loops.  When I selected the frames I made certain the edge of the frame was wide enough to add my own sawtooth hanger.

The letters were cut from Oracal 651 vinyl and mounted on the surface of the glass rather than reversing the image and placing it on the back side of the glass.  I did it this way so that none of the adhesive on the larger letters would be visible from the front.


Saturday, December 14, 2013

The 2103 Holiday Market

I haven't done a craft show in over12 years but my friend Shirley and I decided to do the Holiday Market in Ada this weekend.  I've been working diligently for the past few months making items for the show.  We had a decent crowd but sales were pretty light so I still have the majority of the items on hand.

It wasn't definite that I'd be able to participate since my husband took a fall this week and has some severe injuries.  I thought about it and discussed it with him and decided to do the show.  His recuperation is going to be lengthy and once he comes home from rehab, I'll be needed here 24/7 for a while.

These are items Shirley made.  Tic Tac containers, Ghirardelli chocolate boxes, Hershey's nugget tins and some cute embellished tins.
Shirley also decorated Vin to Go cups with some really cute vinyl cutouts.
 These are floating frames and shadow boxes that I made and put vinyl lettering and images inside.
 I sandblasted ceramic coffee mugs with masculine designs, made some vinyl signs, post it note pad holders, and some little candy jars.
 These are fruit jar mugs, insulated tumblers and beer mugs that I sanblasted. 
I had a rack full of decorated charger plates and glass cutting boards.
 Glass blocks that I sandblasted or decorated with vinyl.  I only made one cake carrier.

 A closer photo of the post it note holders.
Another photo of the floating frames and shadowboxes.

The show was only open from 9:00 until 3:00 so it was a short day. 

If you see anything in the photos that you might be interested in purchasing, just let me know.  The sales were light and I have the majority of these items still on hand.

Thursday, December 5, 2013

Cold Weather and Comfort Food

I'm not sure why cold, wintry weather causes me to want foods that I enjoyed as a child.  Oklahoma is under a winter weather advisory for the next couple of days.  It's grey, cloudy, and a mix of rain and sleet is coming down---and I had to have some home made tomato soup.

We don't get a lot of snow in Oklahoma.  As a kid, when we did get enough snow to play in, my mother gave us "one trip out and one trip in".  In other words, go play as long as you want, but you're not tracking snow in on the floors.  We'd bundle up, go outside and make snowballs and attempt to make a snowman.  We'd stay until we were frozen to the bone because we knew if we went inside she wouldn't allow us to go back out again.

I remember one particular snow day.  We wanted to make snowballs, but had no gloves.  I'm not sure if momma suggested this, or if we came up with the idea ourselves, but, we put socks on our hands to use like mittens.  It probably was our brilliant idea.  Cotton socks get wet really, really quickly when you're rolling snowballs and your hands are then encased in wet ice packs. 

That day when we went inside, momma had a pot of tomato soup ready for our lunch.  I can still smell the aroma of that soup.  It's a good childhood memory, one I associate with being safe and warm at home.

Today is a perfect day for home made tomato soup.  I made myself a small pan of it and finished every delicious drop for my lunch today.

Momma was a "from scratch" cook.  She did keep canned cream soups on hand to make casseroles and once in a while we'd have cans of chicken noodle soup, but she didn't use a lot of convenience foods.  When she put a meal on the table, it came from her hands, not a box or can.

If you've never had home made tomato soup, and you're a tomato soup fan, you don't know what you've been missing.  Real tomato soup is nothing like the congealed, sweet, pink stuff in a can.  You can still taste the tang of the tomato and it's not sweet at all.

I learned to make tomato soup by watching momma do it.  There's no set in stone recipe.  In my opinion, the best recipes are the ones you prepare by sight and tasting.  Here's how my momma, and I, make tomato soup.

You'll need a small can of tomato juice, salt, pepper, baking soda and some sort of milk.  You can use milk from a carton, canned milk, half and half or even heavy cream.  My favorite is just milk from the carton but the cream or half and half will make it much richer.

Heat the tomato juice in a saucepan along with the spices until it comes to a boil.  Then add a generous pinch of baking soda and stir well.  The hot juice will immediately begin to foam.  That's the baking soda neutralizing the acid in the tomato juice.  If you don't use the soda, the milk will curdle when you add it.

Then add enough milk to your liking, lower the heat and simmer until it's heated through and through.  Now, all you need to add is a grilled cheese sandwich and you'll have a wonderful meal!

If you're making a large pot of the soup like the photo above, increase the amount of baking soda you add.  Today I measured the amount I used for 2 cups of tomato juice.  I added 1/4 tsp of baking soda and it was enough.  Momma never measured hers with a measuring spoon, she'd take the handle of the spoon and dip it into the soda box.  Whatever formed a mound on the tip of the handle was what went into the pan.

Heavy whipping cream is what I used to make my soup today.  It made it super rich and satisfying and I enjoyed two bowls full!


Wednesday, December 4, 2013

Old Fasioned Chocolate Pie

This is the recipe my mother used to make chocolate pie.  It's about a thousand times better than any boxed pudding/pie filling and it's very simple to make.  She topped hers with meringue but neither DH or I care for that.  We prefer whipped cream on ours.

The filling will develop a thick layer on the surface as it cools.  If you put a thin coating of whipped cream on it as soon as it cools, you can avoid that.  Otherwise, follow basic pie baking instructions for topping with meringue.

If you want to serve this as pudding and you put it into a large bowl, place a layer of plastic wrap on the surface to eliminate the thick layer that will form.

Old Fashioned Chocolate Pie

¾ cup sugar
4 T. flour
¼ tsp. Salt
6 T. cocoa

2 cups milk
1 well beaten egg
2 T. butter
1 tsp. Vanilla

Combine sugar, flour, salt and cocoa in a saucepan.  Mix well.

Slowly add milk and cook, stirring constantly until thickened and bubbly.  Cook and stir 2 minutes more.

Remove from heat.

Stir a small amount of the hot mixture into the beaten egg.  Mix well and add to the hot mixture. 

Cook and stir 2 more minutes.

Remove from heat; add butter and vanilla.  Mix well.

Pour into baked pie shell or custard dishes to serve as pudding.

Top with meringue or whipped cream.

Sunday, December 1, 2013

Etched Glass Coffee Mug


Bullets on one side and "Camo & Ammo" on the reverse.

Plastic Wine Tumbler

The Dollar Tree had some of these insulated wine glasses last time I was there.  I've seen them all over the internet; some were decorated with vinyl, some were etched, and they were all really expensive.

These will make a cut gag gift for a busy mom!  The words on the side:  Mommy Juice.

It's another item I'm taking to the craft show on the 14th.


Saturday, November 30, 2013

Tic Tac Toe Valentine

The tic tac toe grid is a Silhouette file (Valentine love tic tac toe)  that I sized to fit onto an A2 card.  I pop dotted the center heart and added some white and metallic silver pen work.


Thursday, November 28, 2013

My Thoughts on Thanksgiving

It was 150 years ago that President Lincoln declared a national holiday to be a day for  ""Thanksgiving and Praise to our beneficent Father who dwelleth in the Heavens", to be celebrated on Thursday, November 26.  **

Subsequent Presidents fiddled with the actual date for the national holiday and set it as the final Thursday in November.  

In 1939, November had five Thursdays so  President Roosevelt thought an earlier Thanksgiving would give merchants a longer period to sell goods before Christmas and changed it to the fourth Thursday of the month.   The country was still reeling from the effects of the depression and he wanted to stimulate the economy.

Perhaps his decision was the beginning of losing the real meaning of Thanksgiving. 

As a child, Thanksgiving was all about having a huge meal to be shared with your family.  My mother would cook and bake for days getting ready for the meal.  Our Thanksgiving table couldn't even accommodate all the food she'd prepare.  And, we all did our best to eat everything she sat before us.

There were no stores open on Thanksgiving offering super bargains or crazily extending shopping hours.  And, at our house, the meal wasn't scheduled around any football games that might be televised.  You visited with your relatives, yes, face to face, not via text messages then you ate the food prepared.  Afterwards, you visited again while the kids were outside playing.

In the last few years Thanksgiving has moved away from family meals and traditions and become a stepping stone for greed and envy as shoppers compete to find and buy merchandise.  Retailers have chosen to cash in and promote this by hosting Black Friday sales. Merchandise is chosen and sold for a limited amount of time which forces shoppers to be in their stores at a specific time to take advantage of their pricing.

I, for one, would like to see a return to the "old way" of celebrating the holiday where we'd all take time to be thankful for what we HAVE and not what we can push our way through a mob at 2:00 a.m. to buy. 


** Wikipedia

Monday, November 25, 2013

Valentine A La Okieladybug

Last February my friend, Shirley, aka Okieladybug, hosted a Valentine card making party at her house.

She had designed and precut all the pieces so we could make several cards. 

This is my version of one of her designs.  It was a perfect opportunity to use some of the paper pads I have on hand.  This card uses, seven, yes, count 'em, seven different papers!

The inside sentiment is:  U mean the world to me, Happy Valentine's Day.

card design by Okieladybug


Sunday, November 24, 2013

Paper Doily Card

I combined two different SVG files in Make The Cut for the cup and the steam.  The sentiment was printed on my computer; I added a lace doily and a Wr R Memory Keepers punched border.

Studio G Stamp Valentine

About three years ago, those of us on the Cricut message board were all crazy about Studio G stamps.  Each month a different set came out and it was a foot race to get to Michael's and buy them.

Over time, I've moved away from the dollar stamps but I'm glad that I kept the ones that I bought.  They come in handy when you just want to make a quick card.

The blue background paper is from Paper Studio and I added some tiny hearts with a Martha Stewart punch.  The stamped image was colored with Promarkers.

Valentines? Already??

Yep, we haven't even had our Thanksgiving turkey and I'm making Valentine cards for Operation Write Home!  They have to be received at their headquarters by December 31st to allow time to get them shipped overseas so I have to get busy! 

I haven't made any cards since early October.  All my time has been spent getting things made for a craft show coming up on December 14th in Ada. 

This cute card was seen on Pinterest and I back tracked to the original maker.  You can find it on Califormia Scrappin'.  It caught my eye because of the patriotic colors. 

I used Hallmark card software to print the words and the linked hearts on white cardstock.  Then I cut the red, white, and blue hearts with my Cameo.

My version of a card by Gina Karas

Tuesday, November 19, 2013

Santa Tulle Wreath

This was seen on Pinterest.  I back tracked and found the original post with instructions at Baby Rabies. Her instructions are very clear and it took me less than 2 hours to complete the project.

You'll need:

Santa hat---I found mine at the Dollar Tree
12" foam wreath
50 yards of 6" wide white tulle
glue gun
ribbon for hanger
cardboard to wrap tulle around to cut to the proper length


You'll cut the cardboard into a 15" square and wrap the tulle around it.  Then take your scissors and cut it on both edges so you'll have 15" strips.  This is the fastest way to handle the tulle!

Position your Santa hat on the wreath and mark the area of the wreath you'll want to cover with tulle for his beard.  Remove the hat so it won't be in the way as you work with the tulle.

Tie the 15" strips of tulle on the wreath with a simple knot.

When the beard is nice and full, crumple up a piece of tissue paper to stuff inside the hat and using hot glue, attach the hat onto the wreath.

Cut a short piece of ribbon, fold it in half and either tack it with a few stitches or use the hot glue to make a hanger on the back of the hat, and you're done!

Monday, November 18, 2013

Biker's Sign

I saw this saying on a t-shirt and thought it would be perfect to utilize the last 8" x 10" floating frame that I bought for the craft show.  It's laying on a sheet of white paper so the lettering would show up in the photo.

The font is Antigoni Medium.  I haven't decided yet if I'll put anything on the face of the white frame.  After I look at it a day or two, I'll decide what it needs.


This is the largest vinyl cut out that I've applied in a single piece.  Thanks, Shirley,  for reminding me to use registration marks!

Floating frames are fun to make.  Next time JoAnn's has them on sale for 60% off, I'm going to pick up a few more to have on hand.

Added sort of a checkerboard onto the frame.  I think I like it!


A Few More Post-It Note Holders

 I used a Tim Holtz stamp on this one.


I've had these embellishments for some time.
Finally found something to use them on!


Post-It Note Holders

Dawn Griffith shares how to make these post-it note holders on her Stampin' Up blog Dawn's Stamping Studio.   You can make three of them from a single sheet of 12" x 12"cardstock.

I used some paper doilies, butterflies, leaf stickers and Pearl Pen dots on mine.  The little pens can be found at Staples in a multi-pack.

Saturday, November 16, 2013

Post-It Note Holders

 These are made with clear acrylic frames with the easel on the back.
 I used scrapbook paper and K & Company borders with some adhesive pearls on this one.


Both of these are 4" x 6" in size.


The Tart & Tangy stamp set from Stampin' Up was one of the first sets I ever bought.  I still use it a lot!

 These were done the same way.  They're 3 1/2" x 5" size.  I cut and pop dotted some of the border pieces on these.


These are 4" x 6".  On the yellow one I used some flowers I found at Michael's.  The blue denim one has paper from a Paper Studio stack.

Monday, November 11, 2013

Fettuccine Alfredo With Chicken and Broccoli

This is a dish that I enjoy and my husband will eat, but isn't crazy about having, so, I make it when he's not home for dinner.  It only takes about 20 minutes to make since the sauce goes together quickly.  It takes longer to cook the pasta than any other part of the recipe!

Start the water for the pasta first.  It can come to a boil while you prepare the other ingredients.

FETTUCCINE ALFREDO WITH CHICKEN AND BROCCOLI

1 boneless chicken breast -  Smart Chicken is best
butter
heavy cream
Parmesan cheese
broccoli
olive oil
Fettuccine pasta

Slice the chicken breast across the grain about 1/2" thick
In a skillet, heat 2-3 tsp. of good olive oil
Brown the chicken on one side, turn, and sprinkle generously with black pepper
Cook chicken until done

In a saucepan, melt butter add cream and heat thouroughly
Add Parmesan cheese and keep sauce warm
*** a jar of Bertoli Alfredo sauce can be used****

Separate broccoli into florets and steam in the microwave until tender

Prepare pasta according to package directions.

When pasta is done, add the sliced chicken, broccoli and sauce.

Smart Chicken breasts are pretty large so this will make two generous servings.


Wednesday, November 6, 2013

Miniature Suitcases

I have a set of three tiny suitcases.  This one measures just 11" x 7" and it's the largest of the three.  I used  Challenge Contour font and added some swirls with hearts using Oracal 651 white vinyl.  Then I added two Christmas floral picks and a wired ribbon bow.  This is another project for the craft show next month.


The medium sized one is 5 1/2" x 9 3/4".  I used Partridge font for the lettering and just added a tulle bow on top. The reindeer and snowflakes are Silhouette files.

The smallest one is 7 1/4" x 4 1/2".  I used Partridge font for the lettering and the candy canes are Silhouette files.


Monday, November 4, 2013

Faux cupcake Jars

This project came from Club Chica Circle.  The "icing" on top is white caulk, the "cherry" is a large jingle bell.  I added some diamond dust glitter to make the icing sparkle and set the jar down inside a cupcake wrapper from the Cricut Artiste cartridge.  The openings in the wrapper were just perfect to thread some 1/8" ribbon through to add a bow.

These were done on 4 oz. Ball jelly jars, but any size jar would work.  I filled them with wrapped peppermint candies.


Friday, November 1, 2013

Bless The Food Floating Frame

This is the largest vinyl project I've done.  The frame is 11" x 14".  I used Lobster 1.4 font and a corner decoration found online.

Doing a floating frame is pretty easy.  You don't have to mirror your lettering since it's applied onto the surface of the piece of glass in the rear.

I had tried to use a much more elaborate font to do this and my machine was just not cooperating this evening!  After ruining a couple of pieces of vinyl, I gave up and changed the font.