
Monday, December 29, 2014
Red On Red Valentine Card
Sunday, December 28, 2014
Vintage Light Bulb Card

Saturday, December 27, 2014
Chili Recipes
A couple of weeks ago, I searched high and low for these recipes. I knew they were hand written on lined paper and the last time I had seen them they were tucked between two cookbooks in the kitchen. I found them tonight, typed them and saved them in a recipe folder on my computer. Maybe next time I get the urge to use one I'll be able to find it!
WHITE CHILI
3 cups cooked white beans
2 cups chicken broth
1 medium onion, diced
3 cloves garlic, minced
¼ cup white wine
1 tsp. cumin seeds—if using ground cumin, use less
1 tsp. oregano
½ tsp salt
½ tsp. sage
½ tsp. thyme
½ tsp. marjoram
6 jalapeno pepper slices
Combine 2 cups beans, 1 cup broth and pepper slices
In blender and process until smooth.
Heat 1 cup broth, 1 cup beans, wine, onion, garlic and
seasonings in 2 quart saucepan. Brinkg to a boil. Add
Pureed bean mixture and heat thoroughly.
VEGETABLE CHILI
1 ½ T. vegetable oil
1 cup chopped onion
1 cup chopped celery
1 cup diced carrots
½ cup chopped red or green pepper
3 cloves garlic, minced
3 T. chili powder
¾ tsp. salt
¾ tsp. ground cumin
dash red pepper flakes
½ tsp. ground oregano
1 can tomatoes
2 cups black beans, drained (I prefer to use white beans)
Saute vegetables in oil until tender. Add remaining
Ingredients and simmer for a few minutes.
Good Times Card

Monday, December 22, 2014
Now And Forever Card

Kiss Kiss Card
The card was laid out in Make The Cut software and cut. I Cut both the printed paper for the card front as well as the card base so that the heart opening would line up.

The kissing stick figure couple is a clip art image and the sentiment was sized and printed in Hallmark Card Studio software.
The lace trim was cut from a paper doily.
 I used the heart cut out of the printed paper as a base for the clip art image.
My card was inspired by one seen in a back issue of a card making magazine.
The kissing stick figure couple is a clip art image and the sentiment was sized and printed in Hallmark Card Studio software.
The lace trim was cut from a paper doily.
My card was inspired by one seen in a back issue of a card making magazine.
Saturday, December 20, 2014
Just A Note Card

Friday, December 19, 2014
A Hundred Hearts

Thursday, December 18, 2014
Measuring Cup Card
Okay, I admit it. The idea for this card was totally taken from the Stampin' Up Occasions catalog that arrived today. They have a measuring cup stamp that I really thought was cute, but it's too small for an A2 card front. The stamps are only available as wood or clear, not digital, so there was no way to purchase and resize the image. And, they're not available to order for two more weeks! I was ready to make cards and knew I needed to do these before the inspiration left me.
It took a few minutes to find a clip art image of a measuring cup, add the text and get it resized in Hallmark Card Studio software. Hopefully, Stampin' Up will add this stamp set into their digital stamp collection. When it's available digitally, it's a set I'd really enjoy owning.

It took a few minutes to find a clip art image of a measuring cup, add the text and get it resized in Hallmark Card Studio software. Hopefully, Stampin' Up will add this stamp set into their digital stamp collection. When it's available digitally, it's a set I'd really enjoy owning.
Tuesday, December 16, 2014
Monogrammed Ring Catcher Dishes
I can post the photos now that these have been given to my friends. The little dish is 3" square, white ceramic, found at Pier 1. If you go looking for them, ask for dipping sauce bowls and the clerk should take you right to them. When I asked about them, the clerk told me I was the second person that day buying them for ring catchers.
 Samantha font was used for the letters. The letters measure proximately 1 3/4" high, cut out of Oracal 651 metallic gold vinyl.
 These were gifts for the ladies in the wine group. We had a get together last night and I passed them out to everyone.
Fiesta Bubble Bread
I saw this recipe online and tried it tonight. It's really very good and I'll definitely make it again.
Fiesta Bubble Bread
1/2 c. butter, melted
1-1/2 c. shredded Mexican-blend cheese
1/4 c. shredded mozzarella cheese
10-oz. jar sliced jalapeño peppers, drained
1 t. dried parsley
2-12-oz. tubes refrigerated biscuits, cut into quarters
In a large bowl, combine butter, cheeses, pepper slices and parsley; add biscuits and toss to coat. Transfer to an ungreased Bundt pan. Bake at 350 degrees for 30 minutes, or until golden. Invert onto a serving plate; serve warm.
You can add cooked breakfast sausage too.
 Since there are just the two of us, I used a single can of buttermilk biscuits and reduced the other ingredients. I did not add sausage since we were having it with our dinner.
Fiesta Bubble Bread
1/2 c. butter, melted
1-1/2 c. shredded Mexican-blend cheese
1/4 c. shredded mozzarella cheese
10-oz. jar sliced jalapeño peppers, drained
1 t. dried parsley
2-12-oz. tubes refrigerated biscuits, cut into quarters
In a large bowl, combine butter, cheeses, pepper slices and parsley; add biscuits and toss to coat. Transfer to an ungreased Bundt pan. Bake at 350 degrees for 30 minutes, or until golden. Invert onto a serving plate; serve warm.
You can add cooked breakfast sausage too.
Punched Hearts Card

It seemed like such a simple idea...
Even I find it hard to believe that I spent over 3 hours getting this card laid out and completed. It seemed like such a simple idea. Then it took me forever to find, trace, print and cut, then color the owls and the branch. There are hundreds of MTC and Silhouette files on my computer and no simple tree branch or cutesy owl among them.
Once I found a clip art image that I liked of the owl, it didn't take too long to get it replicated in Silhouette software, traced, and do a print and cut.
A search of clip art images yielded several branches that would have worked but I could never get a decent traced image. They all had double cut lines and I just couldn't get them eliminated. If I used the shadow option, the detail on the leaves was lost since the branch is so small.
In desperation, I went to the Silhouette store and bought the branch file. Then realized- after messing around with it in the Silhouette software for about 30 minutes - that I really, really don't like to cut things with that program. So, I did a trace in MTC and got them cut the correct size.
Granted, part of the 3 hours was spent walking back and forth to the kitchen and snacking on sausage balls I made. The house smelled so good, I couldn't stay out of them!
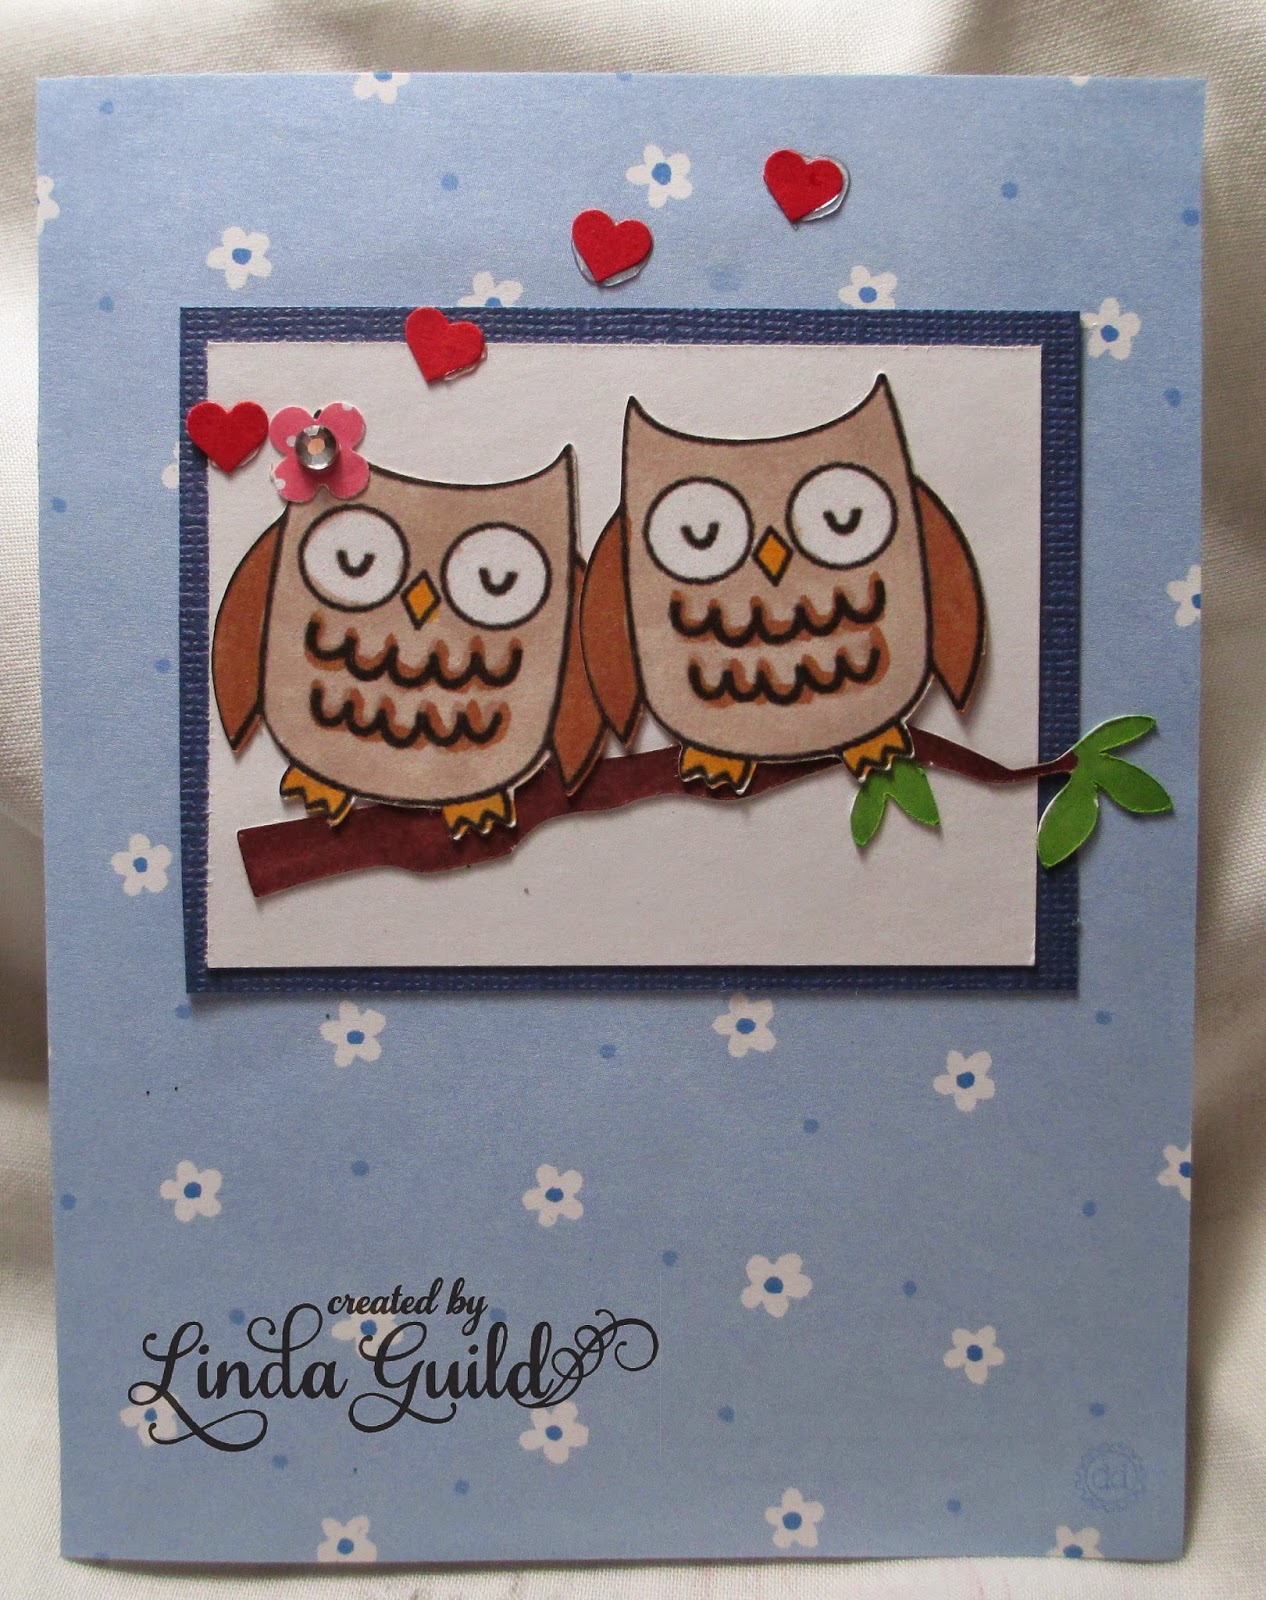 In the end, I'm satisfied with the way this card turned out. It will work well for Valentine's Day, an anniversary or an I love you card any time of the year.
Once I found a clip art image that I liked of the owl, it didn't take too long to get it replicated in Silhouette software, traced, and do a print and cut.
A search of clip art images yielded several branches that would have worked but I could never get a decent traced image. They all had double cut lines and I just couldn't get them eliminated. If I used the shadow option, the detail on the leaves was lost since the branch is so small.
In desperation, I went to the Silhouette store and bought the branch file. Then realized- after messing around with it in the Silhouette software for about 30 minutes - that I really, really don't like to cut things with that program. So, I did a trace in MTC and got them cut the correct size.
Granted, part of the 3 hours was spent walking back and forth to the kitchen and snacking on sausage balls I made. The house smelled so good, I couldn't stay out of them!
Monday, December 15, 2014
A New Twist On A Holiday Favorite
Every family has food items that they associate with the Christmas holiday season. I know our family has to have cheese logs, Chex party mix, smoked cheese, potato soup mix, dipped pretzels, and sausage balls.
Recently I found a new twist to make sausage balls and tried the recipe out this afternoon. The traditional recipe that I've used for years is just a mixture of Bisquick, grated cheddar cheese, and bulk sausage. The new recipe included cream cheese and hash brown potatoes.

Here's the recipe as seen online:
Sausage & Hash Brown Balls
approximately 60
Mix all ingredients until well combined. (I use my KitchenAid mixer with the dough hook attachment) Roll into 1 1/2-inch balls. Bake for 20-25 minutes, or until brown.
Sausage balls may be frozen uncooked. If baking frozen, add a few minutes to the baking time.
approximately 60
- 1 lb hot sausage, uncooked
- 8 oz cream cheese, softened
- 1 1/2 cups Bisquick
- 1 1/2 cups cheddar cheese, shredded
- 1/2 (30oz) package frozen shredded hash brown potatoes (about 4 cups)
Mix all ingredients until well combined. (I use my KitchenAid mixer with the dough hook attachment) Roll into 1 1/2-inch balls. Bake for 20-25 minutes, or until brown.
Sausage balls may be frozen uncooked. If baking frozen, add a few minutes to the baking time.
Here's the way I made it today:
Sausage and Hash Brown Balls
1 lb. sausage, uncooked
8 oz. cream cheese, softened
1 1/2 cups Bisquick
1 1/2 cups cheddar cheese, grated
14 oz. potatoes, peeled and grated **
Using my KitchenAid mixer and dough hook, I thoroughly mixed all the ingredients. Then I used a cookie scoop to form the balls, placed them onto baking sheets lined with parchment paper and baked them in a 400° convection oven for 15-20 minutes until they were golden brown.
**I weighed out 14 oz. of potatoes on my kitchen scale since I didn't have any frozen hash browns on hand. I peeled them and grated them with my food processor, placed the grated potatoes into a large bowl of water and rinsed off the excess starch. I drained the potatoes in a colander, then placed them in a kitchen towel and wrung out all the excess water.
The addition of cream cheese and grated potatoes made the balls much softer and did change the flavor slightly. They don't have as much sausage flavor as the old recipe in my opinion. I sampled them fresh out of the oven while still piping hot and then later after they had cooled completely. The flavors had developed more after they cooled.
Not completely convinced that I'll abandon my old stand-by recipe at this point. These are definitely good, and adding the cream cheese and potatoes stretched the recipe out and made more balls, but I prefer a stronger sausage flavor. The added potatoes did seem to absorb some of the grease from the sausage so the balls were less greasy. I'll give the updated version one more try and use less grated potato or try commercially prepared hash browns. Freshly grated potatoes may have more moisture than frozen hash browns and that would definitely affect the outcome of the recipe.
Sunday, December 14, 2014
Live In The Moment

Using Make The Cut, I laid out the card front and modified the right triangles to fit. It took me at least 30 minutes to decide on the papers to use. I wanted to pick up the colors in the banner behind the triangles and tried multiple combinations of colors and prints before deciding that the turquoise color looked best with an orange layer. Picking colors is difficult for me!
The longer I looked at the photo, the more I thought it needed something on the orange triangles. The added punched flowers were what it needed.

Monday, December 8, 2014
Taking A Look Back...
Out of date Stampin' Up catalogs are some of the publications that I just can't seem to toss out. When I'm looking for card inspiration I get them out and flip through the pages until something catches my eye.
These cards were inspired by photos in the 2009 catalog. I used Card Games and God's Beauty stamp sets.
I colored the joker image with Promarkers and used Make The Cut to cut the heart and circle. There's a little pen work and inking on it also.
 This card has three different shades of purple cardstock; the lightest one looks white in the photo. I used Lilac Posies, Grape Jelly and Bamboo Leaves ink by Memento.
 The background was stamped with Versamark ink for a watermark effect.
These cards were inspired by photos in the 2009 catalog. I used Card Games and God's Beauty stamp sets.
I colored the joker image with Promarkers and used Make The Cut to cut the heart and circle. There's a little pen work and inking on it also.
Monday, December 1, 2014
Let It Snow

Thankful For You Card

Sweetest Card - 30 Minute Card

I saw a card like this using a set of cupcake stamps and decided that I'd rather use the clip art than to stamp and color such small images.
Friday, November 28, 2014
Red Leaves Card

Thursday, November 27, 2014
"Water" You Up To Card

Inspired by a card seen in Just Cards magazine.
The background was embossed with a Cuttlebug folder. I added a border with a Fiskars punch. The fish is a clip art image. I used the print and cut feature on my Cameo. The sentiment was printed with my computer.
Wednesday, November 26, 2014

Red Rose Card
With some help from members on the Silhouette Facebook page, I traced the rose, did a print and cut, then colored them with Promarkers.
The leaves were cut using Stampin' Up's digital image of their Little Leaves Sizzlet and Make The Cut software.
I stamped a 3" square of red cardstock with Stampin' Up's En Francias stamp and Whisper White ink.
After I pop dotted the rose onto the red square, I added some Pearl Pen dots on the corners.
Inspired by a card seen online.
Tuesday, November 25, 2014
Western Cards With Horses

The horse was stamped with Close to Cocoa ink.

Once I got the horses image applied onto the card front, it had too much plain background surrounding the horse so I added an 1 1/4" and 1" scalloped circle and punched 1" star to break it up.
Fall Leaves Card

The smaller rectangle is pop dotted off the card base for dimension.
Bon Appetit Card
Stampin' Up retired the Bon Appetit stamp set a few years ago. It was one of the first sets of stamps I purchased. It hasn't been used on a card in a while but I was inspired today by a card in an old issue of Just Cards magazine to get it out and use it.
I tried to do a print and cut so I wouldn't have to trim the chef image by hand but never could manage to get a good trace on the outline since it's not a closed image.
The pizza is clip art, of course, resized and printed in Hallmark Card Studio software.

I tried to do a print and cut so I wouldn't have to trim the chef image by hand but never could manage to get a good trace on the outline since it's not a closed image.
The pizza is clip art, of course, resized and printed in Hallmark Card Studio software.
Monday, November 24, 2014
Yellow Butterflies Card

You're the best" Card

Embossed Leaves Card

After I removed the mask, I stamped the leaves with Versamark ink and embossed them with gold. I used gold metallic paper for the card front.
By leaving the inside blank, this card could be used for a variety of occasions.
30 Minute Card
I used the print and cut feature of my Cameo for the butterflies. It's so nice to have the capability to cut things out that way. It sure saves a lot of time when you do multiples!

Friday, November 21, 2014
Donut Card

Six Flowers Card
I CASED this card from Melanie Brown's blog post back in 2011. The flowers and leaves are from the Cricut Essentials cartridge. I traced them in Make The Cut software and cut them using my Cameo.
It's a simple card to assemble...once you get all the flowers cut and placed. There are twenty pieces on the card front!

It's a simple card to assemble...once you get all the flowers cut and placed. There are twenty pieces on the card front!
30 Minute Card
The flip flop images are free clip art found online. I resized and regrouped them to fit onto the A2 card front then colored them with Promarkers.
It did take longer than 30 minutes to get the images just the way I wanted but once it's printed and adhered onto the card front, it takes less than 30 seconds to color.
 This card was CASED from one seen online.
It did take longer than 30 minutes to get the images just the way I wanted but once it's printed and adhered onto the card front, it takes less than 30 seconds to color.
Wednesday, November 19, 2014
30 Minute Doily and Butterfly Card

The butterfly is from the CTMH Artiste cartridge, traced and cut with Make the Cut software. I added a shadow and pop dotted it as well as the filigree portion of the butterfly for added dimension.
The sentiment is stamped in gold metallic ink, but it appears silver in the photo.


Subscribe to:
Posts (Atom)