
Friday, November 28, 2014
Red Leaves Card
Thursday, November 27, 2014
"Water" You Up To Card

Inspired by a card seen in Just Cards magazine.
The background was embossed with a Cuttlebug folder. I added a border with a Fiskars punch. The fish is a clip art image. I used the print and cut feature on my Cameo. The sentiment was printed with my computer.
Wednesday, November 26, 2014

Red Rose Card
With some help from members on the Silhouette Facebook page, I traced the rose, did a print and cut, then colored them with Promarkers.
The leaves were cut using Stampin' Up's digital image of their Little Leaves Sizzlet and Make The Cut software.
I stamped a 3" square of red cardstock with Stampin' Up's En Francias stamp and Whisper White ink.
After I pop dotted the rose onto the red square, I added some Pearl Pen dots on the corners.
Inspired by a card seen online.
Tuesday, November 25, 2014
Western Cards With Horses

The horse was stamped with Close to Cocoa ink.

Once I got the horses image applied onto the card front, it had too much plain background surrounding the horse so I added an 1 1/4" and 1" scalloped circle and punched 1" star to break it up.
Fall Leaves Card

The smaller rectangle is pop dotted off the card base for dimension.
Bon Appetit Card
Stampin' Up retired the Bon Appetit stamp set a few years ago. It was one of the first sets of stamps I purchased. It hasn't been used on a card in a while but I was inspired today by a card in an old issue of Just Cards magazine to get it out and use it.
I tried to do a print and cut so I wouldn't have to trim the chef image by hand but never could manage to get a good trace on the outline since it's not a closed image.
The pizza is clip art, of course, resized and printed in Hallmark Card Studio software.

I tried to do a print and cut so I wouldn't have to trim the chef image by hand but never could manage to get a good trace on the outline since it's not a closed image.
The pizza is clip art, of course, resized and printed in Hallmark Card Studio software.
Monday, November 24, 2014
Yellow Butterflies Card

You're the best" Card

Embossed Leaves Card

After I removed the mask, I stamped the leaves with Versamark ink and embossed them with gold. I used gold metallic paper for the card front.
By leaving the inside blank, this card could be used for a variety of occasions.
30 Minute Card
I used the print and cut feature of my Cameo for the butterflies. It's so nice to have the capability to cut things out that way. It sure saves a lot of time when you do multiples!

Friday, November 21, 2014
Donut Card

Six Flowers Card
I CASED this card from Melanie Brown's blog post back in 2011. The flowers and leaves are from the Cricut Essentials cartridge. I traced them in Make The Cut software and cut them using my Cameo.
It's a simple card to assemble...once you get all the flowers cut and placed. There are twenty pieces on the card front!

It's a simple card to assemble...once you get all the flowers cut and placed. There are twenty pieces on the card front!
30 Minute Card
The flip flop images are free clip art found online. I resized and regrouped them to fit onto the A2 card front then colored them with Promarkers.
It did take longer than 30 minutes to get the images just the way I wanted but once it's printed and adhered onto the card front, it takes less than 30 seconds to color.
 This card was CASED from one seen online.
It did take longer than 30 minutes to get the images just the way I wanted but once it's printed and adhered onto the card front, it takes less than 30 seconds to color.
Wednesday, November 19, 2014
30 Minute Doily and Butterfly Card

The butterfly is from the CTMH Artiste cartridge, traced and cut with Make the Cut software. I added a shadow and pop dotted it as well as the filigree portion of the butterfly for added dimension.
The sentiment is stamped in gold metallic ink, but it appears silver in the photo.


Tuesday, November 18, 2014
Bisquick Chocolate Chip Cookies
This recipe was found online. Since I had all the ingredients on hand, I decided to try it out.
I'd rate it a "4".
I used mini chocolate chips and omitted the nuts. It makes a nice, soft cookie. I used real butter and they're very buttery tasting.

Bisquick Chocolate Chip Cookies
1/2 cup butter, softened
1 cup brown sugar, packed
2 teaspoons vanilla
1 egg
2 3/4 cups Bisquick baking mix
1 cup semi-sweet chocolate chips (6 oz)
1/2 cup nuts, chopped, if desired (optional)
Heat oven to 375°F. In large bowl, mix butter, sugar, vanilla and egg.
Stir in Bisquick mix, chocolate chips and nuts.
Drop dough by rounded teaspoonfuls onto ungreased cookie sheet,
about 2 inches apart; flatten slightly. Bake 8-10 minutes or until golden brown.
Remove from cookie sheet to cooling rack.
I'd rate it a "4".
I used mini chocolate chips and omitted the nuts. It makes a nice, soft cookie. I used real butter and they're very buttery tasting.
Bisquick Chocolate Chip Cookies
1/2 cup butter, softened
1 cup brown sugar, packed
2 teaspoons vanilla
1 egg
2 3/4 cups Bisquick baking mix
1 cup semi-sweet chocolate chips (6 oz)
1/2 cup nuts, chopped, if desired (optional)
Heat oven to 375°F. In large bowl, mix butter, sugar, vanilla and egg.
Stir in Bisquick mix, chocolate chips and nuts.
Drop dough by rounded teaspoonfuls onto ungreased cookie sheet,
about 2 inches apart; flatten slightly. Bake 8-10 minutes or until golden brown.
Remove from cookie sheet to cooling rack.
Monday, November 17, 2014
Blue Embossed Butterfly

Dandelion Card
The embossing folder is from Darice. I used a Stampin' Up border punch on the top and bottom edges. The embossed image was colored with Promarkers.

Sunday, November 16, 2014
Loving Life Card

Six Flower Petal Card
I love these loopy petal flowers. One of the punch companies made them in three graduated sizes a couple of years ago and I really wish I'd bought them while they were still available. Make The Cut and Google image search to the rescue! It was a simple process to find a clip art shape online, trace and resize it using the software.

Autobiography in Five Short Chapters
I
There is a deep hole in the sidewalk.
I fall in.
I am lost...I am helpless.
It isn't my fault.
It takes forever to find a way out.
II
I walk down the same street.
There is a deep hole in the sidewalk.
I pretend I don't see it.
I fall in again.
I can't believe I am in this same place.
But it isn't my fault.
It still takes a long time to get out.
III
I walk down the same street.
There is a deep hole in the sidewalk.
I see it there.
I still fall in...it's a habit...but,
my eyes are open.
I know where I am.
It is my fault.
I get out immediately.
IV
I walk down the same street.
There is a deep hole in the sidewalk.
I walk around it.
V
I walk down another street.
Portia Nelson
There's a Hole in My Sidewalk
Friday, November 14, 2014
White Chicken "Chili"
Years ago I had a recipe for making a white version of chili using chicken and Navy beans. It must have gotten lost in the remodeling of our house. Tonight I "re-created" it and it's really pretty good.
It has a lot of broth, so it's more like a soup than what we consider chili. You could use 2 cans of beans and it would still be good.

WHITE CHICKEN CHILI
1 ½ cups diced onion
2 T. vegetable oil
1 can Navy or Great Northern beans, undrained
1 large can Swanson chunk chicken breast, undrained
½ of a 4 oz. can chopped green chilis
1 clove garlic, minced
½ tsp. cumin
1 can Swanson chicken broth
Saute’ onion in oil until almost tender.
Add remaining ingredients and simmer until heated thoroughly.
It has a lot of broth, so it's more like a soup than what we consider chili. You could use 2 cans of beans and it would still be good.
WHITE CHICKEN CHILI
1 ½ cups diced onion
2 T. vegetable oil
1 can Navy or Great Northern beans, undrained
1 large can Swanson chunk chicken breast, undrained
½ of a 4 oz. can chopped green chilis
1 clove garlic, minced
½ tsp. cumin
1 can Swanson chicken broth
Saute’ onion in oil until almost tender.
Add remaining ingredients and simmer until heated thoroughly.
Wednesday, November 12, 2014
Rose Wreath Card
I'm particularly pleased with the way this turned out. I used Make The Cut software to cut a 2.2218 x 2.0312 inch oval from white card stock and then embossed it with a Stampin' Up folder. A pink shadow layer was added.
The rose wreath stamp is from an old set of Stampin' Up stamps. It was colored with Pale Pink and Meadow Green Promarkers.
The small pink flowers were done with a Bitty Punch, the greenery is a Martha Stewart branch punch; the flower centers are Pearl Pen dots.
The card base was embossed with a Cuttlebug folder. The layered ovals are pop dotted for dimension. The bow is done with Baby Pink ribbon.

What's Cookin' ?
The pots are on the From My Kitchen Cricut cartridge. I traced them and cut them with Make The Cut software. The faces are Peachy Keen stamps.


Tuesday, November 11, 2014
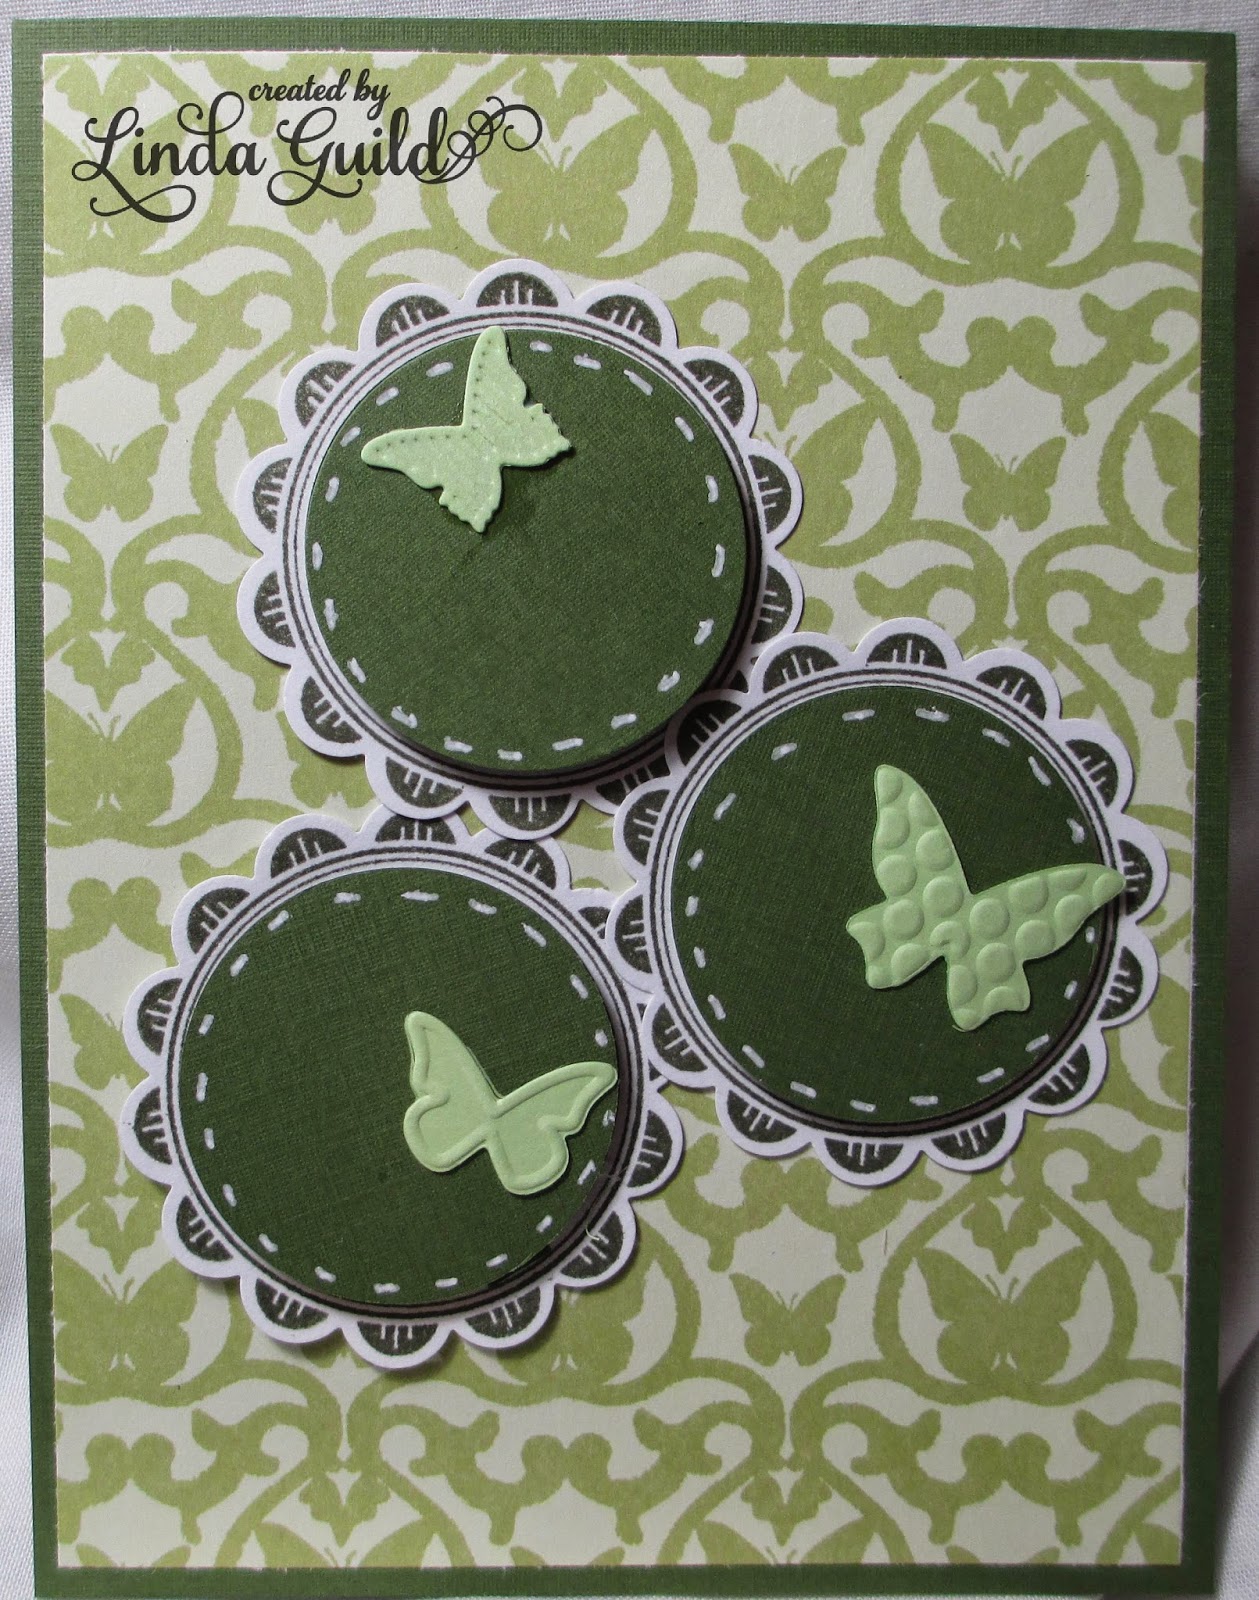
Three Circles Butterflies
I used a Close To My Heart stamp and Always Artichoke ink to stamp the base. It was punched out with Stampin Up's 2" scalloped circle punch. A 2" green circle was pop dotted in the center of the stamped image to cover the sentiment. A white gel pen was used to do the faux stitching on the circles.
The butterflies were done with a Stampin' Up embosslit die.

The butterflies were done with a Stampin' Up embosslit die.
This card was inspired by one seen on Pinterest.
Sunday, November 9, 2014
Blue Banner Card
You would not believe how long it took for me to figure out how to cut the banner shapes in Make The Cut software! It's been so long since I've made a card that I've forgotten the difference between weld, join, and how to resize images and not distort them!
I placed a row of five rectangles sized at 4, 3 1/2, 3, 2 1/2 and 2 inches onto the mat in MTC and joined a triangle into the bottom edge to cut the banner shape.
The layers underneath the ribbon were done with EK Success and W R Memory Keeper border punches. The edges of the white layers were inked with French Blue.
 The card was inspired by one seen on Pinterest.
I placed a row of five rectangles sized at 4, 3 1/2, 3, 2 1/2 and 2 inches onto the mat in MTC and joined a triangle into the bottom edge to cut the banner shape.
The layers underneath the ribbon were done with EK Success and W R Memory Keeper border punches. The edges of the white layers were inked with French Blue.
Saturday, November 1, 2014
30 Minute Card - C'est la vie
While searching through my "Ideas" folder this morning, I saw a card made with Graphic 45 Curtain Call papers. Realizing that I have a huge amount of that Graphic 45 paper, I was inspired to get some of it out and use it up!
This made me realize that I haven't bought a single sheet of paper or cardstock in months--and that I don't need to! On the last few trips I've made into Hobby Lobby, Michael's and JoAnn's, I've come out empty handed because they've had nothing on the shelves that interested me. The quality of the paper stacks at Hobby Lobby and JoAnn's has gotten so poor that I no longer purchase those. The paper will cut fine with scissors or a rotary cutter, but doesn't cut cleanly using a Cameo.
The papers I used for this card are Curtain Call and Glimpse of Paris. Using, MTC software I traced a postage stamp image and cut it to fit the Eiffel Tower image. I printed the sentiment and mounted it on punched circles. The postage stamp is from the same sheet as the Eiffel Tower.
Subscribe to:
Posts (Atom)