
Tuesday, April 30, 2013
Tim Holtz Grunge Cards


Monday, April 29, 2013
Three Strawberries Card

First, I attempted to find a suitable strawberry shape on a Cricut cartridge thinking I'd just trace it in Make the Cut. After about thirty minutes of searching through images in Design Studio, I gave up and logged onto the Silhouette store to search there.
The strawberry I used is a Silhouette image, purchased from their store, opened in Silhouette Studio software then imported and traced in Make the Cut software. Make the Cut is so much easier for me to use when I need to manipulate an image!
I split the image into layers, copied the berry portion and welded it to make the shadow. Then I resized the images to fit onto an A2 card front.
The faces are Peachy Keen stamps. The sentiment was computer printed. I added a twine bow, flowers and baby buttons along with some pen work.
Cumber Salsa--Another Keeper Recipe
This popped up on my Facebook page. Since I love chips and salsa, I had to give it a try. It's really good!
The small amount of cumin in it gives it an unusual taste. I would never have thought of combining cumin with cucumbers! Now I have another "keeper recipe" for my album.

Crisp Cucumber Salsa
Yield 2-1/2 cups
2 cups finely chopped seeded peeled cucumber
1/2 cup finely chopped seeded tomato
1/4 cup chopped red onion
2 Tbsp minced fresh parsley
1 jalepeno pepper, seeded and chopped
4-1/2 tsp minced fresh cilantro
1 garlic clove, minced or pressed
1/4 c reduced-fat sour cream
1-1/2 tsp lemon juice
1-1/2 tsp lime juice
1/4 tsp ground cumin
1/4 tsp seasoned salt
Tortilla chips
In a small bowl, combine the first seven ingredients. In another bowl, combine the sour cream, lemon juice, lime juice, cumin and seasoned salt. Pour over cucumber mixture and toss gently to coat. Serve immediately with chips
Tuesday, April 23, 2013
Forever Card
Inspired by a card seen in a magazine. I frayed the edges of the light green rectangle and added three khaki colored brads.
I stamped the same image three times in different inks for the focal point of the card front. Then, I embossed a stamp from a set that I got on the swap table at the last swarm.
 Quite a simple layout, but I really like the way it turned out.
I stamped the same image three times in different inks for the focal point of the card front. Then, I embossed a stamp from a set that I got on the swap table at the last swarm.

B Happy Card

Monday, April 22, 2013

Yummy Peanut Butter Sandwich Cookies
My oven cooked these in 12 minutes at 350° using the convection cycle. I rotated the cookie sheets at 6 minutes into the cooking time. These are quite large cookies and very rich. A 2' diameter filled cookie is a lot! Recipe is from America's Test Kitchen.

Peanut Butter Sandwich Cookies
Makes 24 cookies
Do not use unsalted peanut butter for this recipe.
1 1/4cups (6 1/4 ounces) raw peanuts, toasted and cooled
3/4 cup (3 3/4 ounces) all-purpose flour
1 teaspoon baking soda
½ teaspoon salt
3 tablespoons unsalted butter, melted
½ cup creamy peanut butter
½ cup (3 1/2 ounces) granulated sugar
½ cup packed (3 1/2 ounces) light brown sugar
3 tablespoons whole milk
1 large egg
Filling
¾ cup creamy peanut butter
3 tablespoons unsalted butter
1 cup (4 ounces) confectioners' sugar
Instructions
1. FOR THE COOKIES: Adjust oven racks to upper-middle and lower-middle positions and heat oven to 350 degrees. Line 2 baking sheets with parchment paper. Pulse peanuts in food processor until finely chopped, about 8 pulses. Whisk flour, baking soda, and salt together in bowl. Whisk butter, peanut butter, granulated sugar, brown sugar, milk, and egg together in second bowl. Stir flour mixture into peanut butter mixture with rubber spatula until combined. Stir in peanuts until evenly distributed.
2. Using #60 scoop or tablespoon measure, place 12 mounds, evenly spaced, on each prepared baking sheet. Using damp hand, flatten mounds until 2 inches in diameter.
3. Bake until deep golden brown and firm to touch, 15 to 18 minutes, switching and rotating sheets halfway through baking. Let cookies cool on sheets for 5 minutes. Transfer cookies to wire rack and let cool completely, about 30 minutes. Repeat portioning and baking remaining dough.
4. FOR THE FILLING: Microwave peanut butter and butter until butter is melted and warm, about 40 seconds. Using rubber spatula, stir in confectioners’ sugar until combined.
5. TO ASSEMBLE: Place 24 cookies upside down on work surface. Place 1 level tablespoon (or #60 scoop) warm filling in center of each cookie. Place second cookie on top of filling, right side up, pressing gently until filling spreads to edges. Allow filling to set for 1 hour before serving. Assembled cookies can be stored in airtight container for up to 3 days.
Miss You Card
 |
| Inspired by a card seen on Pinterest |
The navy blue background was embossed with a Cuttlebug folder. I cut the swirl from the CTMH Artiste cartridge and used the negative cutout on this card. The sentiment was printed on my computer; I used a 1.25" square punch to make the flag ends on the banner. The yellow dots were done with a Pearl Pen.
Friday, April 19, 2013
Cat's Face card
I saw a card like this in Just Cards magazine. It took me longer to find the cat image online than it did to do the card.


Thinking Of You Card
Operation Write Home has received a request for some "romance" cards. I think the sentiment I chose for this one fits that description.
 I printed the butterflies on the polka dotted paper then mounted them onto a 3" square of ivory cardstock. The border was done with a Martha Stewart punch. I based the card on one seen in Just Cards magazine.


Thursday, April 18, 2013
Another "Keeper" Recipe
Our local PBS station shows America's Test Kitchen on Saturday mornings. Two weeks ago, they did a show about making pasta without a machine and shared the following recipe. The show title was misleading since they did use a food processor to make the dough. You can go to America's Test Kitchen and see a demonstration on how their staff modified a traditional noodle recipe to make these.
If you've ever made noodles, you know how stiff the dough mixture is. It's hard to work with and roll out thinly. Because of the added oil and extra egg yolks, this dough is a breeze to handle.
For dinner tonight, I cooked a chicken in the pressure cooker, deboned it, and saved the broth to cook these noodles. They turned out so good that now I have another "keeper" recipe. If you're watching your cholesterol, this isn't a recipe you'd want to eat several times a week since it has eight egg yolks! But, the fat and emulsifiers in the yolks are what make these noodles so good.
On the broadcast, they said the noodles would cook in about 3 minutes. I rolled mine out thicker and I let them cook over 10 before I'd have considered them al dente. The photo shows how transparent they should be when you've finished rolling them out.

Fresh Pasta Without a Machine
From America's Test Kitchen episode: Ultimate Italian.
Makes 1 pound; serves 4 to 6
If using a high-protein all-purpose flour like King Arthur brand, increase the amount of egg yolks to seven. The longer the dough rests in step 2 the easier it will be to roll out. When rolling out the dough, avoid adding too much flour, which may result in excessive snap back.
Ingredients:
2 cups (10 ounces) all-purpose flour
2 large eggs plus 6 large yolks
2 tablespoons olive oil
1 tablespoon salt
1 recipe sauce (see related recipes)
Instructions
1. Process flour, eggs and yolks, and oil in food processor until mixture forms cohesive dough that feels soft and is barely tacky to touch, about 45 seconds. (If dough sticks to fingers, add up to 1/4 cup flour, 1 tablespoon at a time, until barely tacky. If dough doesn’t become cohesive, add up to 1 tablespoon water, 1 teaspoon at a time, until it just comes together; process 30 seconds longer.)
2. Turn dough ball onto dry surface and knead until smooth, 1 to 2 minutes. Shape dough into 6-inch-long cylinder. Wrap with plastic wrap and set aside at room temperature to rest for at least 1 hour and up to 4 hours.
3. Cut cylinder crosswise into 6 equal pieces. Working with 1 piece of dough (rewrap remaining dough), dust both sides with flour, place cut side down on clean work surface, and press into 3-inch square. Using heavy rolling pin, roll into 6-inch square. Dust both sides of dough lightly with flour. Starting at center of square, roll dough away from you in 1 motion. Return rolling pin to center of dough and roll toward you in 1 motion. Repeat steps of rolling until dough sticks to counter and measures roughly 12 inches long. Lightly dust both sides of dough with flour and continue rolling dough until it measures roughly 20 inches long and 6 inches wide, frequently lifting dough to release it from counter. (You should be able to easily see outline of your fingers through dough.) If dough firmly sticks to counter and wrinkles when rolled out, dust dough lightly with flour.
4. Transfer pasta sheet to kitchen towel and let stand, uncovered, until firm around edges, about 15 minutes; meanwhile, roll out remaining dough. Starting with 1 short end, gently fold pasta sheet at 2-inch intervals until sheet has been folded into flat, rectangular roll. With sharp chef’s knife, slice crosswise into 3/16-inch-thick noodles. Use fingers to unfurl pasta and transfer to baking sheet. Repeat folding and cutting remaining sheets of dough. Cook noodles within 1 hour.
5. Bring 4 quarts water to boil in large Dutch oven. Add salt and pasta and cook until tender but still al dente, about 3 minutes. Reserve 1 cup pasta cooking water. Drain pasta and toss with sauce; serve immediately.
To Make Ahead: Follow recipe through step 4, transfer baking sheet of pasta to freezer, and freeze until pasta is firm. Transfer to zipper-lock bag and store for up to 2 weeks. Cook frozen pasta straight from freezer as directed in step 5.
Three Versions of Wild For You Card
Inspired by a card seen in Just Cards magazine, I printed the clip art animals using Hallmark card software. Once I got them placed onto the card base, I couldn't decide what else the card needed. So, I made three versions of it in different colors.
The first one is on a grey background---too dull so I added ribbons and flowers. I tried yellow, pink and blue with different colors of inking around the animals.
 Then I changed the background to green and added two shades of pink flowers and some clip art leaves.
 I like the green background much better. It goes well with the jungle animals.
The clip art images included a pink tropical flower with leaves so I made one using that image too.
Now I can't decide which of the three versions I prefer!

The first one is on a grey background---too dull so I added ribbons and flowers. I tried yellow, pink and blue with different colors of inking around the animals.


The clip art images included a pink tropical flower with leaves so I made one using that image too.
Now I can't decide which of the three versions I prefer!

Wednesday, April 17, 2013
Butterfly Kisses Card

I was so thrilled when I first saw the 3-step punches-----and then I bought some. They're AWFUL! It takes a lot of pressure to cut the first level and by the time you shift it to the third level, it wrinkles the paper!
These are definitely not going to be repurchased when they get too dull to use. The only other punch I can say I like less is any one by Martha Stewart.
EK Success seems to be "cheapening" their punches when you compare them to the ones from two to three years ago. It makes me sad that companies take this route in order to generate sales. I'd rather pay for a single quality product than to have three inferior ones.
I recently purchased my first punches from We R Memory Keepers and they seem to be of the same higher quality as the old EK Success ones that I own. I'll give them a good try and may have to switch to them.
Treasure Card
The stamp images I used on this and the striped background are Graphic 45 papers. The clock face and key are clip art images. I used gold Encore ink to stamp the edge and added some brads.


Monday, April 15, 2013
You're not old card

I used a scalloped border punch, a couple of circle punches and a Bitty punch for some of the elements. The sentiment was printed on my computer. There's a little inking and some pen work too.
This card was inspired by one in an old issue of Just Cards magazine.
Sunday, April 14, 2013

Wine Group Meeting
There are a group of us that meet as an informal wine group. Sometimes we have a theme for the meeting and do serious wine tasting and sometimes we just get together to have a fun evening.
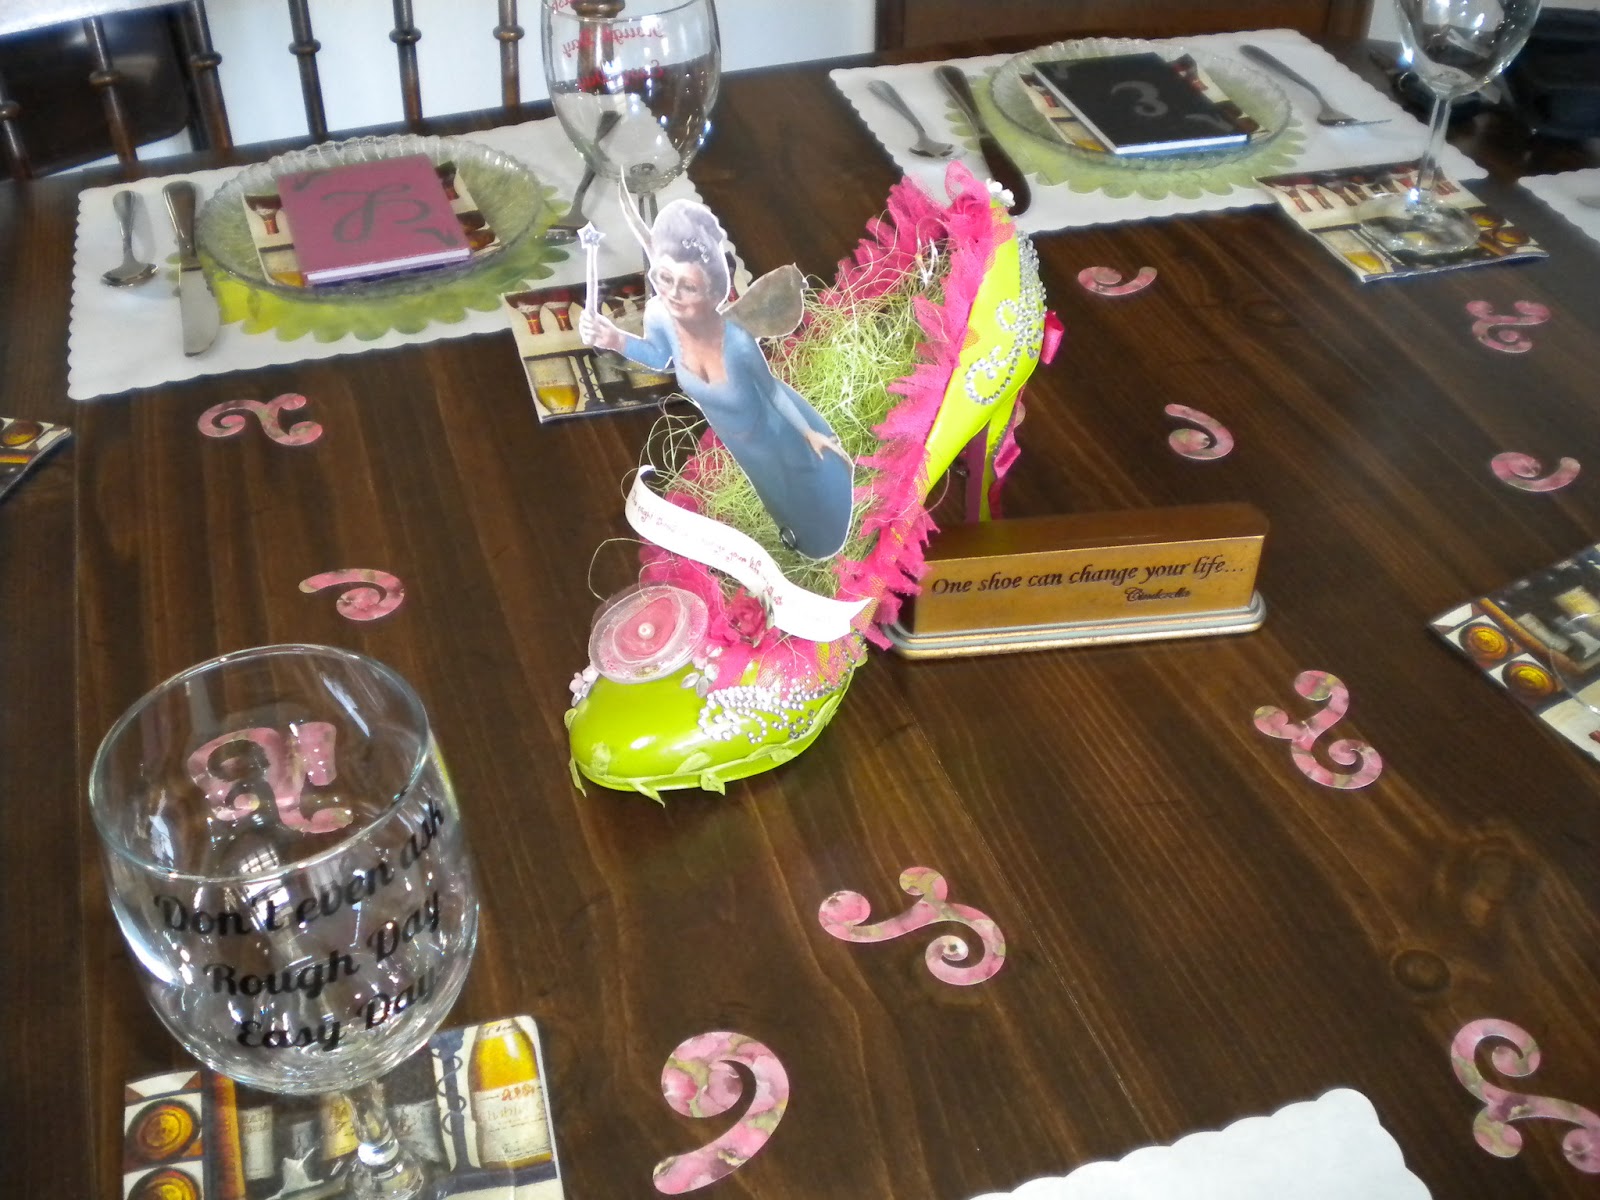
These are photos of the table decorations that I used Friday night for our last meeting.
 This is what I started out with. It was still too plain so I cut some swirls out of pink paper and added them in between the items on the table.
I had to make the picture before anyone arrived with their food. There are only seven of us and we all contribute finger foods, etc. for the evening. By the time all the food containers were on the table, you couldn't even see the decorations!

I collect shoes and decided that would be our theme this time. Four of us had visited a winery earlier in the week. Almost all the wines they had used some sort of shoe in the name.
Peep Toe was one of the white wines; Dorothy's Ruby Red was a red. They have really cute pictures of high heel shoes on their labels.
 This is a closeup photo of the shoe Carrie Elmore decorated and gave to me. The little plaque next to it says "One shoe can change your life....Cinderella". I bought it at Hancock's several years ago to add to my collection of shoes.
 The wine glasses are the ones I posted a while back. The vinyl lettering on the glass reads: "Don't even ask, Rough Day, and Easy Day" the words serve as measurement lines.
I cut the scalloped circles to put under the clear glass plates. Their favor was a notebook with their initial and high heel shoes cut from vinyl.
We all had a great time. It's the first meeting we've had in such a long time that we had a lot of catching up to do. We also all ate way too much because there were so many delicious things brought to share.
These are photos of the table decorations that I used Friday night for our last meeting.

I had to make the picture before anyone arrived with their food. There are only seven of us and we all contribute finger foods, etc. for the evening. By the time all the food containers were on the table, you couldn't even see the decorations!
I collect shoes and decided that would be our theme this time. Four of us had visited a winery earlier in the week. Almost all the wines they had used some sort of shoe in the name.
Peep Toe was one of the white wines; Dorothy's Ruby Red was a red. They have really cute pictures of high heel shoes on their labels.


I cut the scalloped circles to put under the clear glass plates. Their favor was a notebook with their initial and high heel shoes cut from vinyl.
We all had a great time. It's the first meeting we've had in such a long time that we had a lot of catching up to do. We also all ate way too much because there were so many delicious things brought to share.
Mac 'n Cheese Card
Looking around on Facebook, I found a card like this done by Candi Daitch on the Silhouette Cameo Paper Crafts page.
Using Make the Cut software, I managed to import a file of the images, get them split into layers and a make a shadow to cut. The sentiment was printed on my computer using BoogiewoogieHMK font.


Using Make the Cut software, I managed to import a file of the images, get them split into layers and a make a shadow to cut. The sentiment was printed on my computer using BoogiewoogieHMK font.


Saturday, April 13, 2013
Graphic 45 Circus Themed Cards
My friend, Shirley aka Okieladybug Thompson found a great deal on some Graphic 45 papers while she was on vacation in Florida. I think she managed to set a new record for the heaviest luggage on Southwest Airlines when she brought it back! But, I'm glad she did. I'm also glad that she made a card using some of the papers and posted it on Facebook so I could steal her idea!
I love Graphic 45 paper. The sheets with the vintage circus posters was one that I pulled out, looked at, decided I really liked the images and promptly put it back into my storage. I just couldn't decide how to best use the images.
Shirley took the sheet and cut the images out, then used the coordinating papers for the background as well as some of the embellishments. I followed her card layout and like the way these turned out.

The tickets are clip art that I resized and printed in Hallmark software.
This poster image was larger than the card front. I trimmed
it down and then cut the title off and put it at an angle on top of the image.


The circus stamp is from the Le Cirque Collection also. The flowers are some that Shirley and I ordered.
 Turning the card base horizontally was the only way to use this poster on an A2 card.
I love Graphic 45 paper. The sheets with the vintage circus posters was one that I pulled out, looked at, decided I really liked the images and promptly put it back into my storage. I just couldn't decide how to best use the images.
Shirley took the sheet and cut the images out, then used the coordinating papers for the background as well as some of the embellishments. I followed her card layout and like the way these turned out.

The tickets are clip art that I resized and printed in Hallmark software.
This poster image was larger than the card front. I trimmed
it down and then cut the title off and put it at an angle on top of the image.


The circus stamp is from the Le Cirque Collection also. The flowers are some that Shirley and I ordered.

Cheesey Card
I used an embroidery pattern found here as a piece of clip art to color with Promarkers. Then I cut a 5 1/2 x 4 1/4" frame and layered it over the image and added a printed sentiment.

I liked the card okay, but it needed something for dimension. It was just too flat. I embossed the frame and added some paper flowers with Pearl Pen drops for centers.


I liked the card okay, but it needed something for dimension. It was just too flat. I embossed the frame and added some paper flowers with Pearl Pen drops for centers.

Thursday, April 11, 2013
Dad Card
This could be a card suitable for Dad's birthday or Father's Day. I used Antigoni Med font and Make the Cut for the letters.


Monday, April 8, 2013
30 Minute Card

My Totally CASED Card
My friend, Shirley, posted a card on Facebook very much like this one. She knew I'd CASE her idea because I always do! This is my version of her card.
The hot air balloon is from the Cricut Artiste cartridge. I cut out some clouds, layered them and pop dotted them for dimension.
The sentiment is a Stampin' Up stamp and punch. I added a faux line from the balloon to the tag as well as a faux brad with a marker.

Now that I've completed a few of these, I'm off to CASE an owl card she posted today! LOL!
Sunday, April 7, 2013

Coconut Song Card
Yesterday, Shirley posted a card using this cloud paper that we found at the LSS on Thursday. I really liked the way she'd cut out some clouds and pop dotted them onto the printed paper so I had to do it too!
When I woke up this morning, I was thinking about making this card and the Coconut song ran through my mind. My idea was to make the card look as if the background was a sandy beach under a pretty blue sky.
The margarita is from the Cricut cartridge, Mixed Drinks. I printed the sentiment out and punched it with a Stampin' Up punch.

Friday, April 5, 2013
Sepia Photo Card
The photo image on this was found online while searching for vintage photos. The butterflies and the stamp are from Graphic 45 paper. I embossed the narrow strip across the corner with a Cuttlebug folder and the coin is an actual scanned image of some coins DH brought home when he worked in Africa.


Once I made the photograph, I decided the card was still too plain. I added ribbon, photo corners and a distressed paper doily in the background on the second one.

Seminole Patchwork Projects
Quite a while ago I did a post with photos of my projects of Seminole Patchwork. I've been asked why I no longer do this craft and to provide links to instructions on how to make it. I'll tell you why I no longer make the patchwork, but, search engines work just the same for you as they do for me and you can find your own links if you're interested.
After participating in art shows for several years, I just became burned out. I made approximately 3000 of the handbags in the photo plus dozens of vests, full length skirts and other patchwork embellished items.. Whenever I was preparing for a show, I would make strips of patchwork 10 - 12 yards long in each pattern. Then I'd make the item it would be sewed onto.
My plan, back in the 90's was to continue to do the patchwork projects and travel the US doing shows. I'd built up my reputation by participating in shows in Oklahoma, New Mexico, Kansas, Missouri and Texas and had been invited to exhibit in shows across the US. This seemed like a good way to travel and a fun thing to do after DH and I retired.
But, plans do change. And I realized that I'd be working like a dog 3-4 months of the year while at home to get ready for the shows on the road. DH worked overseas for eight years and when he retired, he really wanted to be at home rather than still living out of a suitcase. So, I made the decision to stop making the patchwork.
Seminole Patchwork is a labor of love. It's not expensive to make, but it's extremely labor intensive. If you go online and do a little research, you'll find quite a bit if information on how the construction is done and beautiful examples of truly intricate designs.
I still have all my patterns, tons of fabric, and the ability to do the patchwork. But, for now, my interests lie elsewhere.
Wednesday, April 3, 2013

DAD Card
The large "D" was cut using Times New Roman font; the "DAD" was cut using Antigoni font and Make the Cut software.
It's based on a card seen online. I added fewer brads and the triangles in the corner to break up the open space.
The inside is being left blank so that it can be used for something other than Father's Day by Operation Write Home.

It's based on a card seen online. I added fewer brads and the triangles in the corner to break up the open space.
The inside is being left blank so that it can be used for something other than Father's Day by Operation Write Home.

Tuesday, April 2, 2013
Three Leaves Card

"Orange" You Sweet Card

Father's Day Card
Using a sponge dauber and Memento Inks, I shaded the background. The sentiment was printed in Hallmark software and the horse stamp is one that my friend, Robin Bogle, sent me. I used a Stampin' Up marker to add some blades of grass.


Subscribe to:
Posts (Atom)