Showing posts with label George. Show all posts

Saturday, October 27, 2012

Oak Leaf Card

This card was inspired by one done on a Stampin' Up demos blog.  

Using Design Studio and the George cartridge, I placed a 5 1/4 x 4 inch rectangle on my mat and then resized the oak leaf from B is for Boy to fit and cut it from white cardstock.  I used pop dots to lift it off the green card base and I added some green pen stitching for dimension.

Then I cut the oak leaf again from some embossed  green cardstock and adhered it across the bottom.
The sentiment is a Tim Holtz stamp that I placed onto a shape from Elegant Edges. I inked the edges of the shape and pop dotted it also.


Sunday, August 26, 2012

Three Squares Butterfly Card

I saw this card on Pinterest and tracked it back to a blogger named Biggan.  Her blog is in a foreign language and I was unable to find her real name.  If you'd like to visit, here's a link:   Three Squares Card.

The butterfly within the square was cut using George and Elegant Edges.  Then I cut just the butterfly from the orange patterned paper.  The sentiment is from Close to My Heart, stamped with Memento Tangelo ink.

I embossed a border on the card front using my Scor-Pal.


Sunday, August 19, 2012

Easy Masculine Card

Inspired by a leaflet from Michael's, I used some Graphic 45 paper for the background and Hampton Art Bird Cages stamps.  The images were stamped with Memento Rich Cocoa ink.  The ovals were cut to size using Design Studio and the George cartridge on my Expression.


Tuesday, July 31, 2012

A Half-sheet Collage Card

Shirley, aka Okieladybug, has started a daily FB card and layout challenge.  I'm sort of stuck on making collage cards these days so the first thing I imagined when I saw the card sketch was a clock face.

The clock face was cut from a DCWV stack named Tattered Time.  All the papers in this stack remind me of Steam Punk, which I admire but am clueless as to how anyone comes up with those things!

I used Graphically Speaking to cut the hands for the clock from shiny black paper and mounted them with a brad. I used George and Design Studio to cut a shiny black circle to mat the clock face.   The clock face is pop dotted onto the card for dimension.

Then I used several stamp sets and stamped some images onto the background.  The sentiment is also matted onto shiny black paper.

It's a rare occasion that I make anything other than A2 sized cards but this one just wouldn't have worked on one that small, so I made it a half-sheet card.

This is one collage card that I'm very pleased with!  And, I didn't scraplift this one! lol!


Tuesday, July 24, 2012

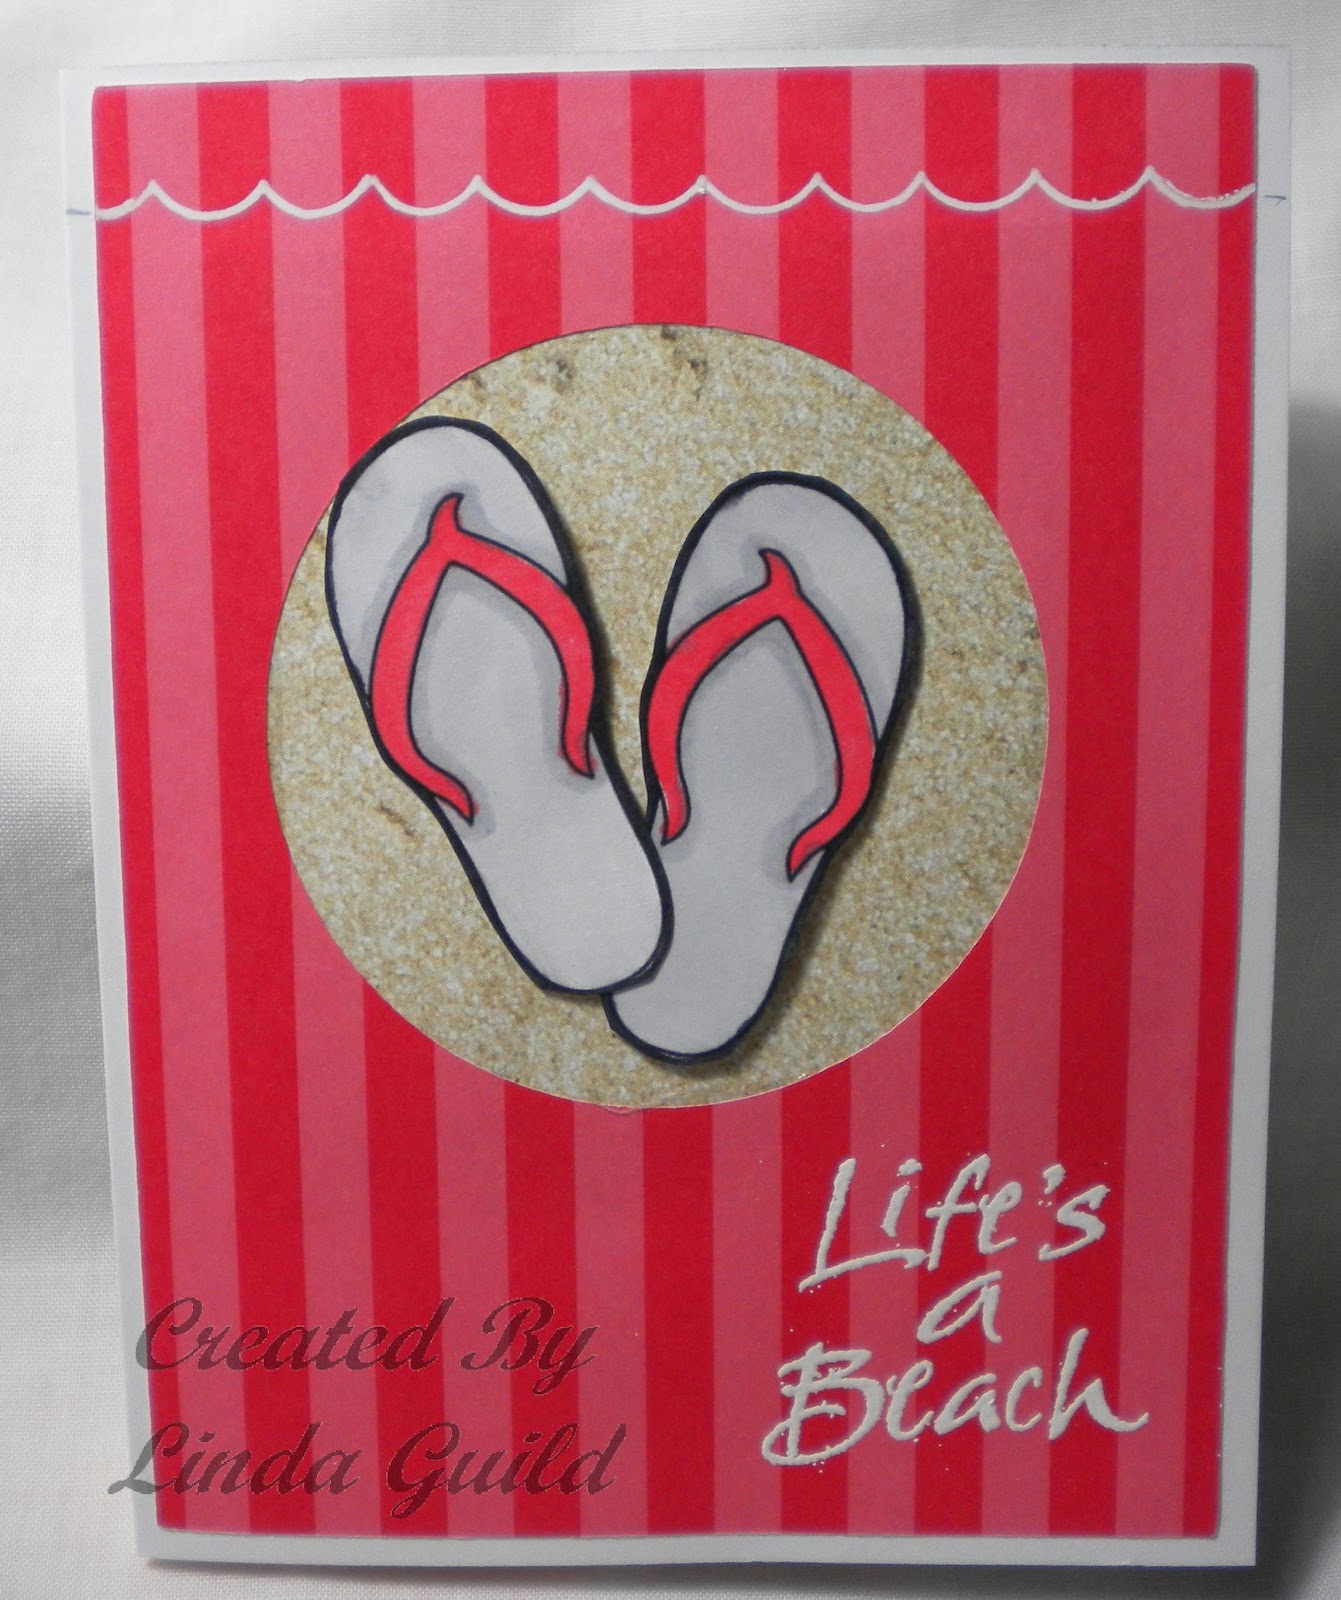
Life's a Beach Card

The George cartridge was used to cut a 2 3/4" circle on the striped card front.  Then I adhered a 3 1/2" square of patterned paper underneath the opening.

The flip flops are free clip art images found online. They're colored with Promarkers and cut out by hand.. They're pop dotted for dimension.

 I punched a scalloped border along a scrap piece of cardstock, put it across the top of the card and used it as a template to do the scallops with a white Signo gel pen.  Using a Versamark pad, I heat embossed the sentiment and I was done!


Saturday, July 21, 2012

Ombre Card

ombre (adjective)-having colors or tones that shade into each other

Recently I saw a card online that incorporated an ombre strip with monochromatic stamped images.  Today, since it's 110° outside, I've been looking through my ideas folder for some cards to make.  It's definitely too hot to go anywhere!

I tried two methods to create a mask for applying the ink.  Blue painter's tape and cutting a stencil.  Both work but the painter's tape pulled the top layer off a couple of pieces of cardstock.  I think I achieved a sharper edge with the painter's tape when compared to my stencil though.

Using the George cartridge, I welded two rectangles and made this stencil.


I applied Memento Rhubard Stalk, Bamboo Leaves and London Fog inks with a soft sponge to the card front and then applied my stamps.


You also could just hold a piece of cardstock or scrap paper in place to create your mask, but you'll need to be sure you don't let it slip while scrubbing the inks onto the paper.

Saturday, July 14, 2012

30 Minute Card

What child didn't have a toy xylophone growing up?  I remember my son driving me to distraction as he "played music" on his.  Little did I know that a few years later, he'd receive his first snare drum as a gift and become an excellent drummer!

This card was inspired by one seen on SplitCoast Stampers.  I used Design Studio and the George cartridge to cut the colored shapes. The strips are cut at .971" in width, the lengths were 3 3/4, 3 1/2, 3 1/4, 3, and 2 3/4".  I punched a hole for the brad 3/4" from the curved end and put them onto the card front with mounting foam.  The mallet is just a 1/4" wide piece of brown paper with a 1" circle glued onto it.


Tuesday, June 12, 2012

Rock Star Card

Original design by Carolyn King.

The color combination came from one suggested on Design Seeds.  If you ever get stuck and need some help in selecting colors that coordinate, there are multiple suggestions on this site.

Original design by Carolyn King
I trimmed off 1/2" from the cover of the card and then adhered a 1/2" strip of paper onto the inside edge.
The stars and circle were cut using the George cartridge.  The dark brown scalloped piece was done with a border punch.  Then I stamped the sentiment and added some Stickles for bling.

Friday, March 23, 2012

Masculine Card


My friend, Robin Bogle, sent me the horse stamp.  It's stamped with rich cocoa Memento ink onto cream colored cardstock and colored with Promarkers.  The plaid paper is from the Paper Studio stack named Yee Haw!  Using Design Studio and George cartridge, I cut an oval large enough for the stamp to fit inside.I added a knotted piece of baling twine for some dimension. 

Monday, January 16, 2012

Bunny Butt Easter Card

The concept of the bunny's butt has been around for a long time.  I did the same idea using pom poms, felt, Easter grass and miniature clay pots back in the late 1970's!  It was cute then, and it's cute now!

I did use my Expression and the George cartridge to cut the openings in the card front but the rest of the bunny is done with punches.  I inked the edges of the punched shapes and pop dotted the tail for dimension.


The sentiment "Hoppy Easter!" was printed in card making software and punched with a SU punch.  I added a couple of pink Stickles dots and the card was complete.

Saturday, January 7, 2012

Stamp Club Card for Tonight

Every month I go to stamp club and never seem to get anything completed.  This time I took a card kit with 10 ready to assemble cards just so I could say I finished some cards!

After seeing a card similar to this on Pinterest,  I decided that I'd make my own mini envelopes to use.  We'd had a demonstration at stamp club a while back on how simple it is to make them.  After several attempts at doing it by hand, I gave up and began looking through my list of images on the cartridges I own for an envelope cut. file to use instead.

While on the phone with Okieladybug, I tried to cut an envelope small enough for the card front.  I wanted one that did not have shapes cut out on the envelope flap.  Every cut. file I found was a shaped one.  It took Okie less than 10 minutes to make the cut. file I wound up using in Design Studio!   She emailed the file to me and it took no time to cut out the ones I needed.

I used card making software to print the sentiment and George to cut the hearts, then just rounded the corners of the cards and I was done.

Saturday, December 31, 2011

Lime Green Valentine

What an unusual color combination on this card!  And, for once, I came up with it on my own!  Shocking, I know, since I'm color challenged.

I used an EK Success border punch, cut the heart using my George cartridge and then embossed it with a Cuttlebug folder, inked the edges and added some simple embellishments.  The flower centers and the tiny pearls on the edge of the heart were done with a Pearl Pen.  The sentiment was computer printed and the edges of the background were shaded with olive ink.


My card was based on one by Laura O'Donnell that I saw on Pinterest.

Monday, December 26, 2011

Patriotic Themed Valentine

Carla Bazhenow shared this card on her blog.  I used  Cuttlebug folders to emboss the papers, sanded the blue Coredinations cardstock and inked the edges of the checked star and the red stripes.

The heart was cut using George and the stars from Indie Art.

It's a great patriotic themed Valentine card that will go to Operation Write Home.

Tuesday, December 20, 2011

Snow Globe Card

This card was inspired by one seen on Splitcoast Stampers.  I tried to go back on that site today to get the name of the person who posted it on there and the photo has been removed.

I used George, Doodlecharms and Bloom to cut the shapes.  The card front was embossed with a Cuttlebug folder.  The bird is from an old set of SU stamps; I colored it with Promarkers.  The snowflakes were made using a Pearl Pen.

Thanks to Okieladybug, aka Shirley, for giving me some photography tips and explaining how to use a homemade light box.  The photos I made of this card really turned out better than the ones I made before she explained how to place a lamp to illuminate the object!


I'm going to have to work a little more on the line work on the snow globe base. The Promarker bled into the cut so I need to smooth it out with some shading so it looks straighter.  

The inking on the card would have looked a lot better if my Color Box chalk inks weren't so dry.  I have several colors of these inks and use them a lot but every one of the blue ink pads I've purchased is dried up when I get them!  There are six blue ink pads on my work table right now and they're all that way---and they're new!  I sure need to find some other brand of blue ink to buy!

Friday, December 16, 2011

Rows of Hearts Valentine Card

 You may think it's a little early to be working on a Valentine Card but when I saw this one I had to make it!   Thank you, Maile Belles for sharing your creation!

Using Design Studio and the George cartridge, it took no time at all to cut the rows of tiny hearts.  Each row is mounted with an 1/8" strip of mounting foam.  The sentiment was printed using card making software.

Sunday, June 26, 2011

Easy Cards Today

 Stamped cartridge was used to cut the green background piece underneath the leaves.  Added some Stickles in the corners and a rafia bow.
The butterfly is from Mickey and Friends, the scalloped blue circle is from Elegant Edges and George was used for the polka dot circle.


Since it's summertime and most of the TV shows are re-runs, I decided to do some "re-run" cards and use up some supplies on hand. 

Sunday, May 15, 2011

Star Quality Card

 Blue background was embossed with Cuttlebug;  George was used to cut the stars;  Sentiment printed in card making software;   Added some baker's twine and stickles
The red stars are pop-dotted for dimension.

This card was based on one I saw online.

Tuesday, April 26, 2011

"You make my heart sing" card

When I'm looking around online and see a card that catches my eye, I save it in an ideas folder to use for inspiration.  Most of the time I try to be sure whose card I copied so that I can give them credit and will even post a link back to their blog if they have one.

This card has been in my folder for some time.  I know that the cardmaker's name is Nancy Kirk but I don't know if she posted it on Splitcoast Stampers or on a blog.  Wherever it came from, thank you, Nancy for sharing your card! 

The red hearts are cut from DCWV Old World stack using my George cartridge.  The music paper is vellum layered over white cardstock.  The sentiment was computer generated and the dotted ribbon came from Offray.
The scalloped border was done with a SU punch and I used my Corner Chomper to round the edges.

Friday, March 25, 2011

Punch Bunny

The internet is such a great source of ideas to try out!  Last night while checking out some different blogs, I ran across this simple little bunny.

All you need is an 1 3/4" circle punch, a 1/2" circle punch, and two sizes of ovals to make the body parts.  You can use a regular hole punch to do the black circles for the eyes and the pink for the nose. 

Just add a little shading around each of the white pieces, some dots on the eyes and cheeks, and lines for whiskers and toes and you're done. You can give him a little "attitude" by folding down one of his ears about half way if you want.

These little guys can multiply quickly if you need a lot of them for your grandchildren or Sunday school class, too!


Since the George cartridge has these basic shapes on it, you could make a bunch of bunnies in no time with your Expression.

Here's what you'll cut using George:
     2 circles 1.75 inches
     2 circles .5 inches for cheeks
     4 ovals 1.75 x 1.375 inches for foot pads
     4 ovals 1.375 x 2 inches for feet and ears

     hole punch circles for eyes and nose

Thursday, March 17, 2011

Lacy Labels Cards

Yesterday I picked up Lacy Labels and today had a struggle trying to come up with some ideas to use it!  Nothing seemed to look good together when I was picking out paper, etc.  LOL!


So, I put Lacy Label aside for another time and started looking through the Cricut Magazine and got inspired to do this card.  I used George to do the scallops, the leaves are from Accent Essentials.  I found the sentiment stamp at the LSS garage sale last Saturday.  There's Glossy Accents in the center of the little Prima flower.  It looks dull because it's not dry yet!  LOL!  I added a few dots with my Signo pen and was finished for today!