Showing posts with label Flower cards. Show all posts

Sunday, May 27, 2018

Sunday Afternoon Cardmaking

 I used one of my favorite Stampin' Up stamp sets on this one.  The citrus images are so versatile and can be used on many types of cards.
 These large flowers have been in my stash for quite a while.  I typically do not use them on my cards if the card is to be mailed because the flower gets crushed by the post office machinery.
This card was inspired by one I saw on Pinterest.  The playing cards were cut in half.  I printed the sentiment using card making software.  The inside sentiment is "Hoping yous is a winner!" 

This will make a good card for a man's birthday.

Wednesday, May 17, 2017

Just making cards this afternoon...

The newest Stampin' Up catalog arrived today which is always good news.  The bad news is you can't order from it yet!  There is always something in it that I want to make NOW!  lol!  So I used my Cameo and some stamps to make my version of their project.

The sunglasses are from Forever Young cartridge.  I used a Peachy Keen stamp for the sun's face and added some ink on the cheeks.  The sentiment was printed in Hallmark Card Making software.


I saw a card similar to this online and dug out some stamps I've owned for several years to make this one.  The flower is inked with Rhubarb Stalk and I colored the leaves with a Promarker.

Monday, August 3, 2015

Polka Dot Flower Card

The flowers and leaves are digital images from Stampin' Up, Blossom Builder punch and Fun Flower shapes.

It's not evident in the photo that the darker turquoise square has been sprayed with Glimmer Mist and has a metallic sheen.

Friday, November 21, 2014

Six Flowers Card

I CASED this card from Melanie Brown's blog post back in 2011.  The flowers and leaves are from the Cricut Essentials cartridge.  I traced them in Make The Cut software and cut them using my Cameo.

It's a simple card to assemble...once you get all the flowers cut and placed.   There are twenty pieces on the card front!


Tuesday, July 1, 2014

My Version of a Partial Cut Flower Die

Last night I saw a card done with a partial cut flower die.  The petals were cut, the center was left intact on the background.  It's designed so that you can lift the petals for dimension.

Being the basically cheap person that I am, I decided I'd just make my own file to cut the flower and not spend the $20 on the die.  Having a file in Make the Cut allows me to resize the image whereas the die would be just a single size.

Doing the file took longer than I anticipated.  After wrestling with it for about 30 minutes, I gave up and went to bed.  Some of my best thinking goes on while I sleep!  As I woke up this morning, I knew exactly what I'd done wrong last night and finished the file in just a few minutes.


The first card was done with 1 1/2" squares of paper and a punch.  I punched the image from the striped square and then punched it again from a lighter shade of coordinating cardstock.  Then I glued just the center of the flower down and lifted the petals so the white background would show through.


 This one was done with the MTC file I made.  I like both cards.  The second one will be much faster to do multiples for Operation Write Home, but I like the contrasting flower in the first one.

Two good options for cards....now, I need to do a partially cut butterfly too!

Sunday, August 18, 2013

Flower Shadow Card

This entire card looks grey.  The card base is actually a pale pink cardstock, I printed the sentiment in grey ink, stamped the flowers with grey ink and then stamped it again on some grey polka dotted paper and cut it out.  Then I pop dotted it over the stamped images.

Saturday, June 1, 2013

Blue Flower Card

My mission this week is to use as many sheets of floral paper as possible.  I have a huge stack of floral prints that I want to use and make room for some new paper!

Thursday, August 11, 2011

How I Made The Flower Card

This is an A2 sized card.

!.  I covered the card front with green checked paper.

2.  Tape a solid pink piece of 5.5 x 4.25" paper onto a piece of pink striped paper the same size.  (If you   have double sided paper, you can just use that instead.

3.  Mark the center of the bottom edge of the pink paper and fold the corners in to meet. Lay this onto your card front and determine if you need to trim any excess off across the top so that it fits where you want onto the card.  I think I probably trimmed off about .75 " on mine.

4.  I used the owl punch from Stampin' Up to make the tulip shape.  Punch one from pink paper and then trim the owl's feet off with scissors.  Punch a second owl shape and using your scissors just cut two curved pieces out of the body to make the outer petals.  Ink the edges of the white petals and glue them onto the pink base.

5.  Using a Su Five Petal Flower punch, punch two from white cardstock, emboss them with a Cuttlebug folder.  The center is one of the shapes from SU's Boho blossoms punch.  I inked the edges of the petals.

6.  The smaller flowers are made with the Boho Blossoms punch too.  I just layered them.

7.  When ready to assemble the card front, just apply adhesive to the back of the pink papers and stick them onto the green checked card front.  Arrange flowers the way you want.  Then I used a couple of dots of glue to hold the folded edges of the pink paper in place, placed glue dots on the backs of the flowers and tucked them into place.  Attached a bow with a glue dot and you're finished.

First Cards Uploaded On My New Computer

This afternoon has been spent getting software installed and data restored onto my new computer.  The computer I've been using is at least five years old and had become so slow that I was pulling my hair out waiting for things to load!

These are cards that I made yesterday while I was "computerless".  Fred came back to check on what I was doing and teased me about having to make cards "by hand" since I couldn't use my Design Studio to lay them out.  Each of these were inspired by cards in an embellishment magazine that I had on hand.

 The flowers are all made with SU punches and Cuttlebug embossing folders.
 The small flowers are SU stamps and the stem is an old stamp I've had for some time.  The papers are from SU
I used some Studio G alphabet stamps to do "dreams" and the other letters were done with some Martha Stewart stamps. 
The word "wish" is made from letters cut out from some
Tim Holtz paper.  I just tore the edges of the paper and inked it with Chestnut Roan ink.

Saturday, July 16, 2011

Flower Card

The background on this is a page torn from an old encyclopedia that I found in a stack of free books at the library.

The flowers are made using an 1.75" and 1.5" scalloped punch. I used a Brocade Cuttlebug folder for some added texture on these. The centers are buttons stamped from SU's Button, Button stamp set and then punched using a Boho Blossom punch.

I printed the sentiment in my card making software and punched it with an 1.25" circle punch.  Added some inking to the edges for shading.

The grass is done with a SU scalloped border punch and I just cut some .25" strips to use for the stems.

The leaves were made with my Preserves cartridge.  They're a lemon that's cut at .714 x .615.  I sized it using Design Studio to fit.

This card was inspired by one I saw in an old issue of Cards Magazine.

Tuesday, April 26, 2011

Card for today

I'm not getting much done today because of the HSN launch of the new Cricut Expression 2.  Since they've had several shows featuring it I've been watching TV most of the morning.  I even saw it at 2:00 a.m. hoping to see some of the layouts that Okie had sent in for their contest.  LOL!

This card was an experiment to see if my new printer would work on vellum.  I set up the sentiment in my cardmaking software and ran the vellum through my HP printer and it worked fine.  My old printer always smeared the ink whenever I printed on vellum.

The iris came from a package of K & Co. embellishments that Okie saw in the clearance bins at Michael's on our last trip.  The scalloped circle is punched out of mica paper, which doesn't show up in the photo.

I also used a Gelly Roll pen on the iris to add some sparkle to it.  That way it looks better next to the mica paper.

Saturday, April 9, 2011

Flower Cards

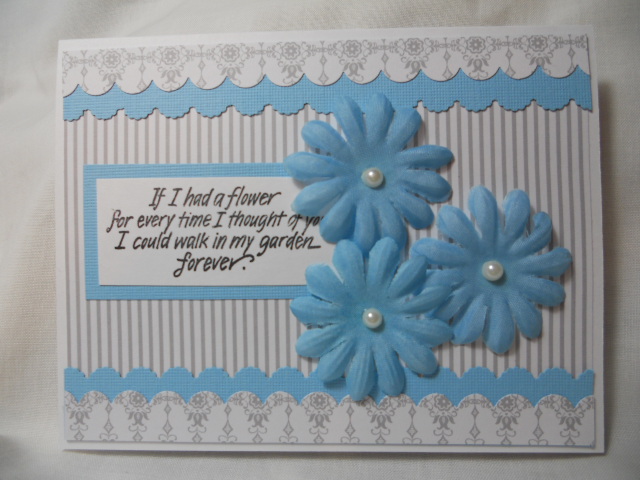
The sentiment is one I stamped several of last Thursday at stamp club.  Just used my border punches, some Prima flowers and a few stick on pearls to finish these up.  The paper is all SU.