Sunday, June 5, 2016

Pinterest Inspired Cards

To make the folded back portion I measured down from the top 2 5/8" and over 1 1/2", made a pencil mark at that point then just cut across to it.  I folded the double sided paper back to that point, making sure that I folded it to the corner.

The balloons were traced and cut using MTC software.  I added some white gel lines and drew the strings. They're pop dotted for dimension.


I used my Cameo and MTC to cut the curve and the 1/4" holes in the black polka dot paper.

The sentiment was computer printed and punched with a Decorative Label punch.  The butterflies were done with an Elegant Butterfly punch.

I added some Pearl Pen dots onto the butterflies and pop dotted them for dimension.


Friday, June 3, 2016

Honeycomb Birthday Card

This is my first attempt at making a card using my new computer.  It took me quite some time to get all my files transferred, software installed and figure out how Windows 10 works!

The honeycomb background is a file created by Okieladybug to use with Make The Cut software. I modified it by adding some additional hexagons and welding a rectangle across the center portion.

The sentiment was cut using Lobster 1.4 font.  The balloons were traced and cut and they're pop dotted for dimension.

It was inspired by a card seen on Pinterest (of course).

Friday, May 20, 2016

Learning my new computer

Just got a new Windows 10 computer and am trying to figure it all out.  It's sure different from what I've been using!  I still have no clue on how to set up favorites, get icons onto the desktop, etc.  When I tried to type in the address for this blog, I got a message saying I couldn't access it because of the security certificate.  But, when I searched for it using the identical URL, I wound up here and was able to type in this post!

Thursday, May 19, 2016

30 Minute Cards

The watermelon is made from three concentric half circles.  I drew the seeds with a marker.  The flower is punched; the sentiment computer printed.


The cup is made of two clip art images, layered with pop dots for dimension.  The heart is punched; the sentiment computer printed.  I added some pearl pen dots for the "steam".

Friday, May 13, 2016

Petite Petals Wreath

This was done with Petite Petals punch and stamp using Bermuda Bay ink.

A Pair of 30 Minute Cards


The white background paper was positioned on the embossing folder to provide space for the computer generated sentiment.

The butterflies were done using a Sizzix embossing die.  I used navy blue mica paper to add a little sparkle to the white card front.

I pop dotted the embossed card base as well as each of the butterflies.


The inside sentiment was printed using Hallmark Card Studio software.


The background was embossed with a Swiss Dots folder.

The stamped image was colored with Promarkers.


Monday, May 9, 2016

Chicken and Rice Casserole

I took the photo before I baked it.  It looks much more appetizing once the cheese gets brown and bubbly.

Next time I make it, I plan to use more celery and carrots.


This makes a large casserole.  I divided it into two 2-quart casseroles.  
One for the freezer and one for dinner this evening.


CHICKEN AND RICE CASSEROLE

1 can chicken broth
1 cup rice

2 chicken breasts, cut into cubes
2 ½ cups water


2-3 T. olive oil
4 stalks celery, sliced
3 carrots, sliced
1 onion, finely chopped
1 tsp. minced garlic
salt and pepper to taste

¼ cup butter
¼ cup flour
3 cups grated cheddar cheese


Put rice and chicken broth into a 2 quart covered casserole and microwave
on high for 10 minutes.

Bring 2 ½ cups of water to a boil in medium covered saucepan and add chicken.  Cook until chicken is done.  Remove chicken and reserve the liquid.

Saute carrots, onion, celery and garlic in olive oil until crispy tender.  Add cooked vegetables to the rice and broth, stir well.

Make a roux with the butter and flour.  Add reserved liquid from the chicken and bring to a boil.  Add 2 cups grated cheese and cook until hot throughout.

Add cheese sauce mixture to chicken, rice and vegetables.  Put into a 9 x 13 pan, top with remaining cup of grated cheese.  Bake at 350° for 20-30 minutes.


Dog In Window Card

This embossing folder came with an issue of Simply Cards and Papercraft magazine.

I embossed the solid cardstock then cut out the window opening. Then I embossed the checked cardstock, cut the curtains out and adhered them onto the light blue base.

The stamps I used came with the embossing folder.


Sunday, May 8, 2016

Flower Shop Stamps Card

 This is a little different way to use your Flower Shop stamps, Pansy and Petite Petals punches.

The ink is Crushed Curry.  The greenery is Little Leaves die.


 This is Bermuda Bay ink from Stampin' Up.   It matches the background paper too well and there's not enough contrast.

I experimented with different color combinations before deciding I like the two colored flowers best.

The flower center was punched with the Petite Petals punch.  It's the
center of one of the larger
flowers in the Flower Shop set.


Biscuits Like Momma Made

This recipe is the closest one I've found that turns out biscuits like my momma made while I was growing up.

Don't roll the dough too thin, it needs to be about 1 1/2" thick to get the tall, fluffy biscuits I grew up eating.


Mile High Biscuits

3 c. flour
1 1/2 t. salt
1 T. sugar
1 1/2 t. baking powder
1 stick butter
3/4 c. buttermilk (I have made these with buttermilk as well as the 'homemade' buttermilk version of 3/4 c. milk + 2 T. lemon juice and they work out amazing either way)
1 egg
1/4 c. water

Preheat oven to 425 degrees. Combine flour, salt, sugar, baking powder and butter until crumbly. Mix in buttermilk, egg and just enough water to make workable dough. Mix the dough until it is just barely combined (don't over mix). Roll the dough onto a floured cutting board about 1 inch thick. Cut with a 2 inch biscuit cutter, or a 2 inch round cup. Place on a greased baking sheet (touching each other) and bake 12-15 minutes or until golden brown. Makes about 12-15 biscuits, depending how thick you make them.

***LEAVING the dough 1 1/2" thick means you'll wind up with 6 biscuits.  They bake up about 2" high and are quite large. I never mess with a biscuit cutter.  I roll or pat the dough out into a rectangle and  cut the dough into pieces then gently shape it using my hands.

***ONLY hand mix your dough.  The dough will be too tough and the dough will become dry if you use a mixer. You don't want to over mix this recipe. The best way to mix this dough is with a pastry cutter or using two knives and cutting the dough back and forth. This method takes a little longer but will ensure the perfect biscuit. You want pieces of butter left in your biscuit, that is what keeps the dough light and flaky.
 

Wednesday, April 27, 2016

Teal Gingham Card

The bow was cut with a die.

The butterfly is a Martha Stewart punch---and the reason I no longer purchase her punches!  It has never punched completely through and is a total pain in the butt to use.  Most of the time it just hangs on the punch rack above my work table.  It's just one of several MS punches I've purchased that don't work as they should.

The border punch is from We R Memory Keepers.


Thinking of You Card

I embossed the card base and rounded the outer corners.

The sentiment was printed on my computer with Nokia Brush HMK font and punched using Stampin' Up's Decorative Label punch.  The shadow for the punched shape was cut using MTC.

One half of a paper doily was tucked under the printed paper section.

Tuesday, April 26, 2016

Father's Day Card

The deer head is a clip art image.  I made the shadow underneath using a Promarker and added some greenery with a Martha Stewart punch.

The sentiment is on two layered Stampin' Up punched shapes.

I printed the sentiment using Silhouette Studio software and then did a print and cut for the punch shape.


Diamond Plate Father's Day Card

Thanks to whoever shared this card online. I wish it had been watermarked so I could give credit to the designer.  It was super fast to make several.

I used a diamond plate embossing folder and MTC to do the circles.  The sentiment is computer printed.  The inside sentiment is for Father's Day.


Monday, April 25, 2016

Vintage Truck Father's Day Card

I cut the auto tags out of a printed sheet found in the  clearance section of the LSS.

The vintage truck is a Tim Holtz stamped image.

The background is embossed with a diamond plate folder.

Sunday, April 24, 2016

Embossed Father's Day Card

A quick card done with a Darice embossing folder, some clip art and a crimper.


Graphic 45 Father's Day Cards

This group of cards was done using some old Graphic 45 papers that Shirley and I found at Tuesday Morning.


Saturday, April 23, 2016

Father's Day Card

Now that I've delivered my Mother's Day cards to the nursing home it's time to get started doing some for Father's Day.

My stamp library doesn't have a lot of masculine themed stamps but this horse head is one of my favorites to use.

It's stamped with Close to Cocoa ink and mounted onto a frayed section of burlap.

The concho image and feathers are clip art images. 

The sentiment was printed on my computer.

Monday, April 18, 2016

Red Roses Mother's Day Card

The roses are a print and cut image.  I pop dotted one onto the doily and then pop dotted an identical image on top.


Unmounting Wooden Stamps

I've had some inquiries about how I unmounted my wooden stamps.  My blog post from March, 2012 explained how I stored them once they were removed but omitted any details on how to remove them from the wood blocks.

Rather than spend so much time making a blog post with instructions, I'm taking the lazy way out and posting a link to my friend Shirley's blog.  She has some great photos and instructions on how to remove the stamps and apply cling foam so they can be used on acrylic blocks. 

Hope this answers any questions!  Okieladybug's instructions on unmounting stamps

Saturday, April 16, 2016

Mother's Day Card with Apron

The apron was cut using my Cameo.  I printed the sentiment onto some vellum and added heart "pockets" with a Stampin' Up punch.


Mother's Day Card

A Swiss Dot embossing folder was used for the base of the flowers.

The sentiment was computer printed and trimmed with a Stampin' Up border punch.

I added adhesive pearls for the flower centers and brads to the sentiment cut out.

This is another Mother's Day card that will be given to the local nursing home for their residents.

Sunday, April 10, 2016

Daffodil Pocket Mother's Day Card

The small envelope was cut using my Cameo.  I added some pen work along the outer edges.

The daffodils are a print and cut image.  The sentiment was computer generated.  I used PesannaHMK font.

The inside sentiment is "and wishing you a Happy Mother's Day".

Mother's Day - 30 Minute Card

You don't have to spend hours on a card to get one that's really nice and that you'll be proud to give.

I printed the sentiment by computer and added three Petite Petal flowers with Pearl Pen centers. 

The edges of the popped up layer were rounded to add a little interest.


Rounding the edges of the printed inside sentiment ties it to the layout of the card front.

I stamped two more images beside the sentiment.

Another Recipe to Try!


Bacon Cheeseburger Pasta Salad

    1-1/2 cups mayonnaise
    1/4 cup, plus 2 Tbsp, ketchup
    1/4 cup, plus 2 Tbsp, yellow mustard
    1/2 cup, plus 2 Tbsp, dill pickle relish
    2 tsp black pepper
    1 lb penne pasta, cooked and cooled
    1-1/4 lbs ground beef, cooked, drained, and cooled
    3/4 lb bacon, cooked until crisp, drained, cooled, and diced
    3/4 cup red onion, small dice
    10 slices American cheese, medium dice
    6 cups iceberg lettuce, large dice
    3 cups cherry tomatoes, halved

In a large mixing bowl, combine the mayonnaise, ketchup, mustard, relish, and pepper to make a dressing-like mixture. Add the penne, beef, bacon, red onion, American cheese, lettuce, and tomatoes into the same mixing bowl. Stir together until combined and coated with the dressing. 


This was shown today on a cooking show.  It sounds interesting and I'll have to give it a try.

Saturday, April 9, 2016

Petite Petals Punch Mother's Day Card


The flowers were done using a Petite Petals stamp and punch from Stampin' Up.  I embossed the base with a Darice Folder.

This card was based one one done by Blythe , a Stampin' Up demo.  I saw it on Pinterest and thought it would be simple enough to make multiples for donation.

I especially liked the inside sentiment trimmed down to allow space for the flower shapes.

Mother's Day Card With Cherries

The diamond edges were done with a Fiskar's border punch.

I used a 2" circle to stamp the cherry leaves and added two buttons cut with a Sizzix Sweet Buttons die.

The sentiment was printed using Hallmark Card Studio software.

Thursday, April 7, 2016

Embossed and Inked Butterfly Card

The butterflies were embossed onto vellum.  I trimmed the embossed area following the upper edge of the design then colored the butterflies on the back side using a Promarker.
This gives the impression that the butterflies have been cut out to let the card base color show through.

The sentiment was printed on my computer then punched with a Word Window punch and layered onto a Modern Label punched out shape.


The white butterfly was embossed with a Brocade folder and pop dotted for dimension. It's a Martha Stewart punch.

Sunday, April 3, 2016

3 Dimensional Pansies Mother's Day Card


Glenda Calkins, a Stampin' Up demonstrator, shared a video on using their Pansy Punch to make three dimensional flowers. 

After watching it, I decided it was something that would work well on Mother's Day cards for the nursing home residents.


It takes quite a bit of time to assemble the pieces but the results make it worth the time.

The background was embossed with a houndstooth folder.  I used MTC to resize and cut the base for the sentiment.

Sunday, March 27, 2016

Mother's Day Card - 30 Minute Card

The sentiment is computer generated.  I embossed the bottom section with a Cuttlebug folder then added five paper flowers with adhesive pearl centers.

The inside sentiment is also computer generated using Hallmark Card Studio software.

Butterfly Card With Window And Vines

Using MTC, I cut the rectangle and vine in the white card base.  The butterflies and the rest of the plants are a Memory Box die. 

The die was cut several times then I cut it into segments and glued them onto the card front.

There are four embossed lines for a little added texture.

"Cheesey" Card

This card was totally CASED from one seen on Splitcoast Stampers.

I used MTC to cut the holes for the cheese and used Silhouette software to print and cut the mouse image.  It was colored with Promarkers.  The mouse is from Your Next Stamps Quirky Animals stamp set.

Mother's Day Sweater Card

This card was inspired by one I found while doing a Google search for Mother's Day card ideas.

I cut a piece of copy paper the same size as the card front and drew a "V" shape in it to determine the angle and size for the neck opening.  This was used as a template to mark the back side of the floral cardstock and cut it out.

The lacy collar was done with a Stampin' Up border punch and cut to 1/2" wide.  The placket is also 1/2' wide.  I embossed the blue cardstock to give it a more lacy look for the collar and placket.

Looking back at the papers I chose makes me wish I'd chosen something other than mini-dots for the bottom layer.  Once the card front was assembled, I decided the large open "V" was too plain and added a Pearl Pen dot necklace.  Dots on dots!

The flower shaped buttons are from the Dollar Tree.  I was wandering around the store and discovered them on the aisle with the automotive stuff!  They were no where near their craft supply area.

This template is really handy to have around.  It gets used a lot to decide what size circle punch to use for a particular stamp or to draw an arc.  It was found at Hobby Lobby in the area with drafting and art supplies.  I have two of these.  Once has circles from 3 1/2" down to 1 1/2" and this one has 2 1.4" down to 1/16".

I used it to create the arc shape for the Pearl Pen dots in the necklace.


 There was a comment left on Facebook after I posted this card in a card making group with the suggestion to add thread to the buttons.

They had already been adhered to the card so, instead, I used a Pearl Pen and just added a faux thread across from side to side.  It does improve the appearance of the buttons and I didn't have to fight to get thread looped though them!

Monday, March 14, 2016

30 Minute Card - Monarch Butterfly

Sometimes the most simple card turns out to be one I really like. 

I used some scraps of paper with script print and just picked up the olive color with the background paper and ribbon.

The butterfly is by Tim Holtz.

Tuesday, March 8, 2016

Large Butterfly Card

Today I'm playing with all the new supplies that arrived last week.

The birch tree embossing folder is from Stampin' Up; the butterfly is a Tim Holtz stamp that I colored with Promarkers; the greenery was die cut.


Sunday, March 6, 2016

Quatrafoil Background Card

This afternoon I traced and cut a quatrafoil background image.  It measures 5 1/2 x 4 1/4" so it will completely cover an A2 card front. 

The stamp is from Inkadinkado.  I used Crushed Curry ink.

The sentiment stamp came with a card making magazine published in the UK.

Using MTC, I resized and cut Stampin' Up's real estate punch for the sentiment. 

The ribbon is Lemongrass 1/4" gross grain ribbon.

This card was inspired by one seen on Pinterest.

Thursday, March 3, 2016

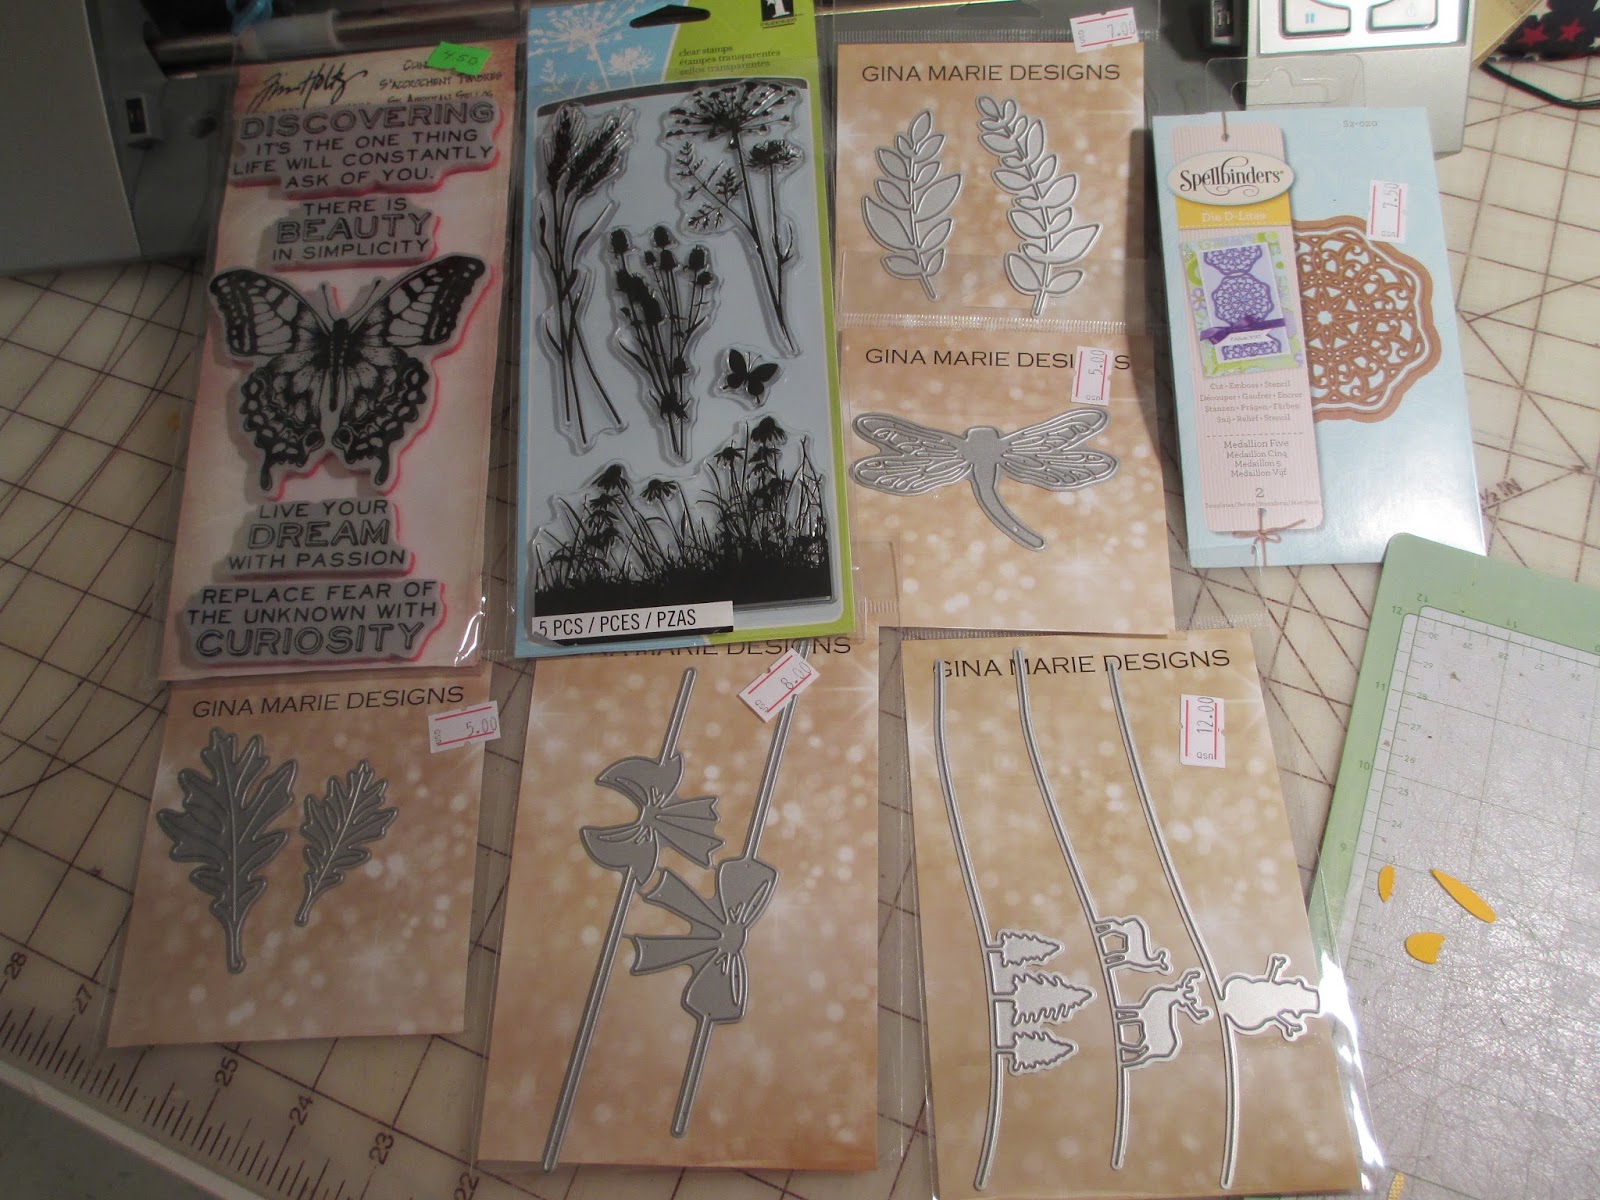
New Supplies Arrived Today

This is a shout out for Scrapbook Outlet .  These are the goodies I ordered from them that arrived today.

They had the lowest prices I've found on dies and stamps.  The large butterfly set by Tim Holtz was less than $5.   I had never seen the bow and winter scene dies before.  The bow die will come in really handy for card making.  I may have to do a little shading on it with a Promarker to add some dimension but I won't have to worry about it getting mashed in the envelope.