
Sunday, January 26, 2014

Tuesday, January 21, 2014

The Perfect Valentine
What could be more perfect than letting someone know you love them more than bacon? LOL!

Inspired by a card seen online, the bacon images are clip art that I printed, shadowed and cut out by hand. They're pop dotted on the card front.
The sentiment was printed in Hallmark card making software. I added some pen work on the outside edge.
Collage Card


brown mat for the patterned paper rather than making the
entire card front with the patterned paper.
Saturday, January 18, 2014
Lock & Key Card
I designed and printed the sentiment and the clip art image of the lock and key onto printed cardstock using Hallmark card making software. Then I reprinted the lock and key, cut them out and pop dotted them over the printed image.

Friday, January 17, 2014
ASL "I Love You" Card
The ASL sign for "I love you" is one of the first ones my granddaughter learned. Even Cooper, who's just 2 1/2 will flash the sign to us as he's leaving.
Today I got the idea for this card and searched for a clip art image of a hand in this position with no success. This came from the Silhouette store, I purchased it then traced it in Make The Cut software and added a shadow for dimension. The original file didn't have a shadow and was just too flat looking.

Today I got the idea for this card and searched for a clip art image of a hand in this position with no success. This came from the Silhouette store, I purchased it then traced it in Make The Cut software and added a shadow for dimension. The original file didn't have a shadow and was just too flat looking.
Thursday, January 16, 2014
Bremertown Musician Card

2 1/8 x 2 3/4 black rectangle
3 1 x 3 3/4 rectangles
I used a clip art image and added some Pearl Pen dots. The lighter colored strip was embossed with a Cuttlebug folder.
Drywall Mesh Mask
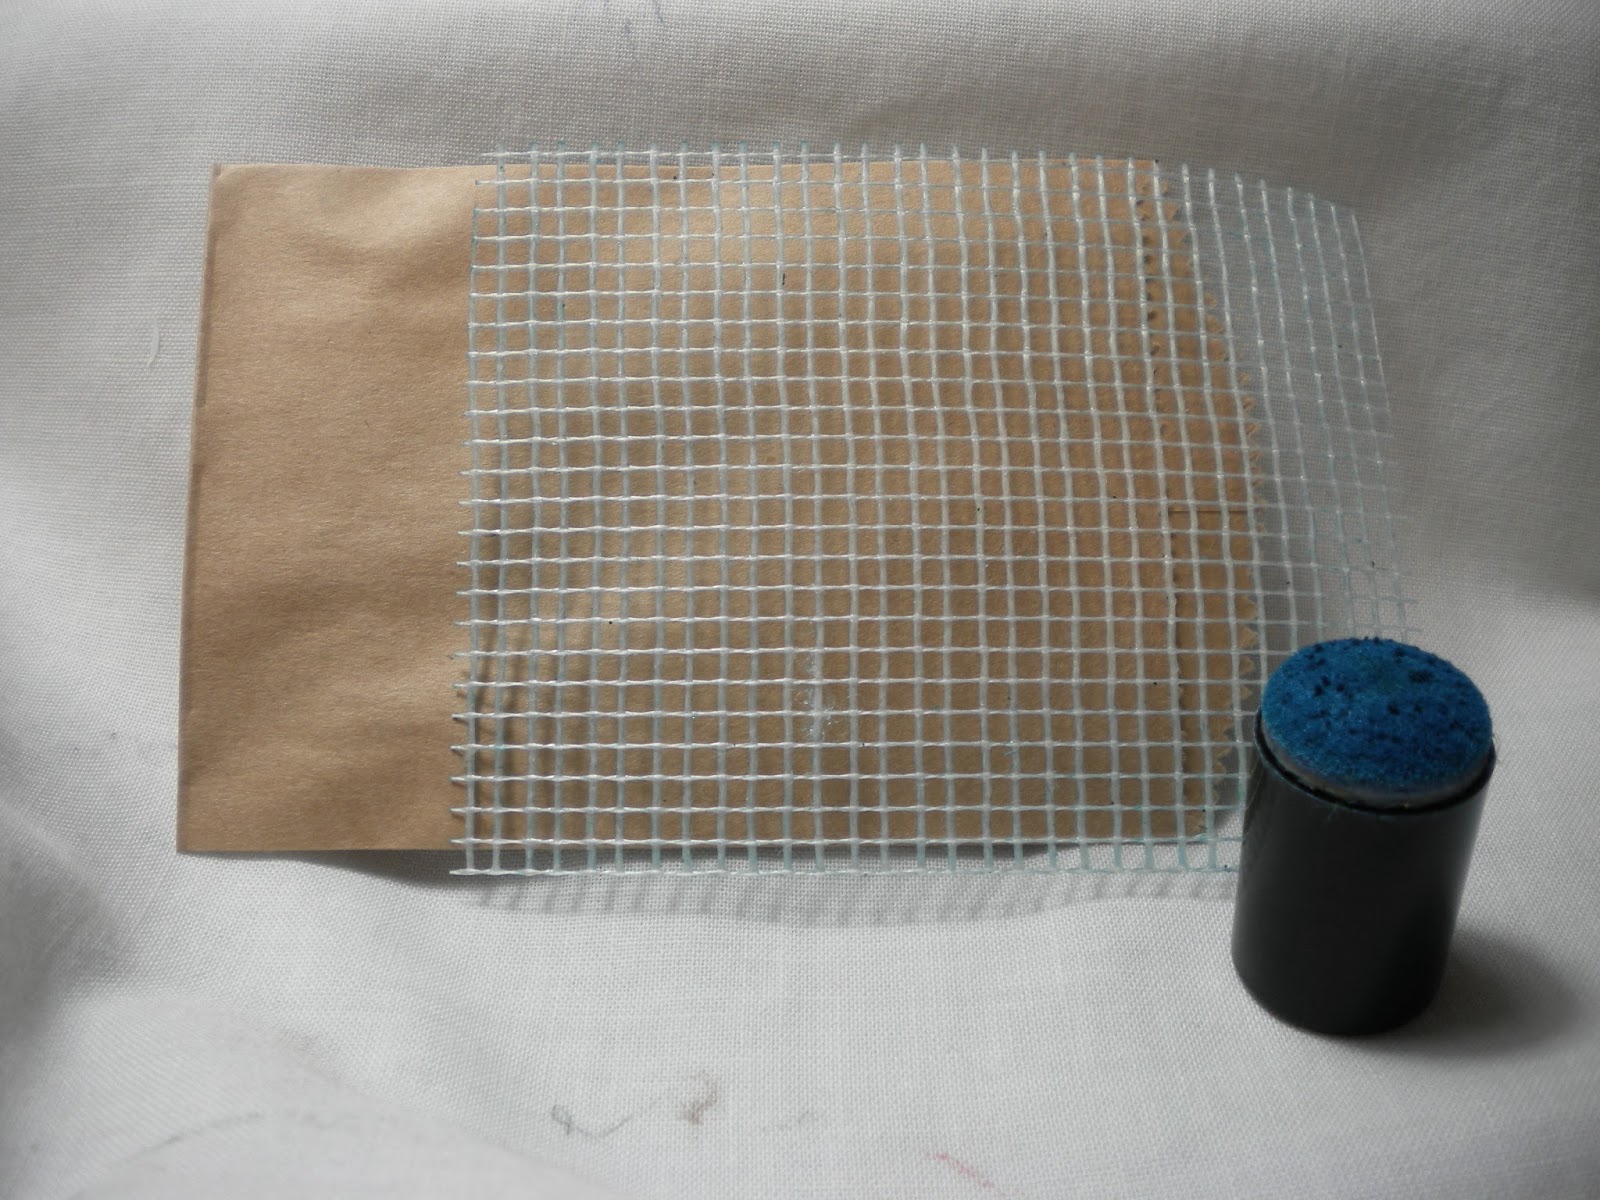
I pressed the drywall mesh onto a t-shirt to remove some of the adhesive. Then I applied it onto the envelope and inked the outside edges. The grid work of the mesh gave a nice pattern.

Masking Tape Technique
This is a technique explained to me by a Stampin' Up demonstrator. You ink masking tape, then apply it onto paper and gently peel it off. The texture of the tape makes a nice image.
For this card, I cut a piece of 3 1/4" x 5" white cardstock, and inked 1" wide masking tape with three colors of ink. Black embossing powder makes the sentiment stand out. The tree image is from SU's Lovely as a Tree stamp set.
 I like the texture of the background from the masking tape. Now I just need to figure out a good way to ink the tape without inking all my fingers too!
For this card, I cut a piece of 3 1/4" x 5" white cardstock, and inked 1" wide masking tape with three colors of ink. Black embossing powder makes the sentiment stand out. The tree image is from SU's Lovely as a Tree stamp set.
Wednesday, January 15, 2014
iPhone Heart Card
I found a clip art image of a Lego heart and imported it into MTC to cut it out to resemble a pixelated heart. The heart was embossed with a Cuttlebug folder.
The sentiment was printed in Hallmark card software using Courier New font.
This was inspired by a card seen online. The caption under the card was "taking the time to do more than text is a real treasure". Very appropriate these days!

The sentiment was printed in Hallmark card software using Courier New font.
This was inspired by a card seen online. The caption under the card was "taking the time to do more than text is a real treasure". Very appropriate these days!
Scrappy Apple Card
Since the pieces on the card front are only 1 1/4" wide, this card is a good way to use up your narrow scraps of printed paper.
The sentiment is from a CTMH stamp of the month set, Sweet Life; the apple is from Preserves cartridge. I tweaked it some and cut it in MTC software. The edges of the apple and leaf are shadowed with Chestnut Roan ink and I added a white highlight on the apple with a gel pen. The red dots on the stamped center piece were done with a Promarker.
For an A2 size card you cut: 2 pieces of patterned cardstock 1 1/4" x 4"
2 pieces of patterned cardstock 1 1/4" x 2 3/4"
1 piece of white cardstock 1 3/8" x 2 5/8"
These pieces can be arranged so that you have 1/8" of the card base showing through. Start in one corner, place your first piece so that there's 1/8" of the base showing on the outer edge and the other three pieces will fit perfectly.
Then stamp your sentiment and place the center piece.

The sentiment is from a CTMH stamp of the month set, Sweet Life; the apple is from Preserves cartridge. I tweaked it some and cut it in MTC software. The edges of the apple and leaf are shadowed with Chestnut Roan ink and I added a white highlight on the apple with a gel pen. The red dots on the stamped center piece were done with a Promarker.
For an A2 size card you cut: 2 pieces of patterned cardstock 1 1/4" x 4"
2 pieces of patterned cardstock 1 1/4" x 2 3/4"
1 piece of white cardstock 1 3/8" x 2 5/8"
These pieces can be arranged so that you have 1/8" of the card base showing through. Start in one corner, place your first piece so that there's 1/8" of the base showing on the outer edge and the other three pieces will fit perfectly.
Then stamp your sentiment and place the center piece.
Monday, January 13, 2014
Butterfly Shadowbox Frame
Wish I could say this was my original idea, but, it's not. I saw something similar on a Facebook page and adapted Toni Arthur's idea for a frame I had on hand.
Our local Dollar General Store had these framed pieces of "art" for only $6.00. I liked the scroll work in the corners and since the frame sits about 3/4" from the picture, I took it apart and treated it as a shadowbox.


 Twisting the wire on the back to keep it in place made me remember all those toys the grandkids opened at Christmas. One year, it took at least 10 minutes to get a Barbie doll and all her accessories off the cardboard backing---while an excited 5 year old was bouncing up and down in anticipation of playing with it!
 The pink pieces of paper indicate where the wires were attached.

The butterflies were punched from vellum and mounted on a matching punch out of white cardstock. I used some glue dots and some pop up glue dots to attache the white cardstock punchouts onto the background and vellum adhesive on the overlays. The wires were covered by three of the butterflies.
I used a Cuttlebug die and folder, Martha Stewart punch and an EK Success punch for the butterflies..
This was made for my main bathroom but I have a feeling when my friend, Leonna, sees it, she'll wind up owning it. She loves butterflies more than I do!
Our local Dollar General Store had these framed pieces of "art" for only $6.00. I liked the scroll work in the corners and since the frame sits about 3/4" from the picture, I took it apart and treated it as a shadowbox.
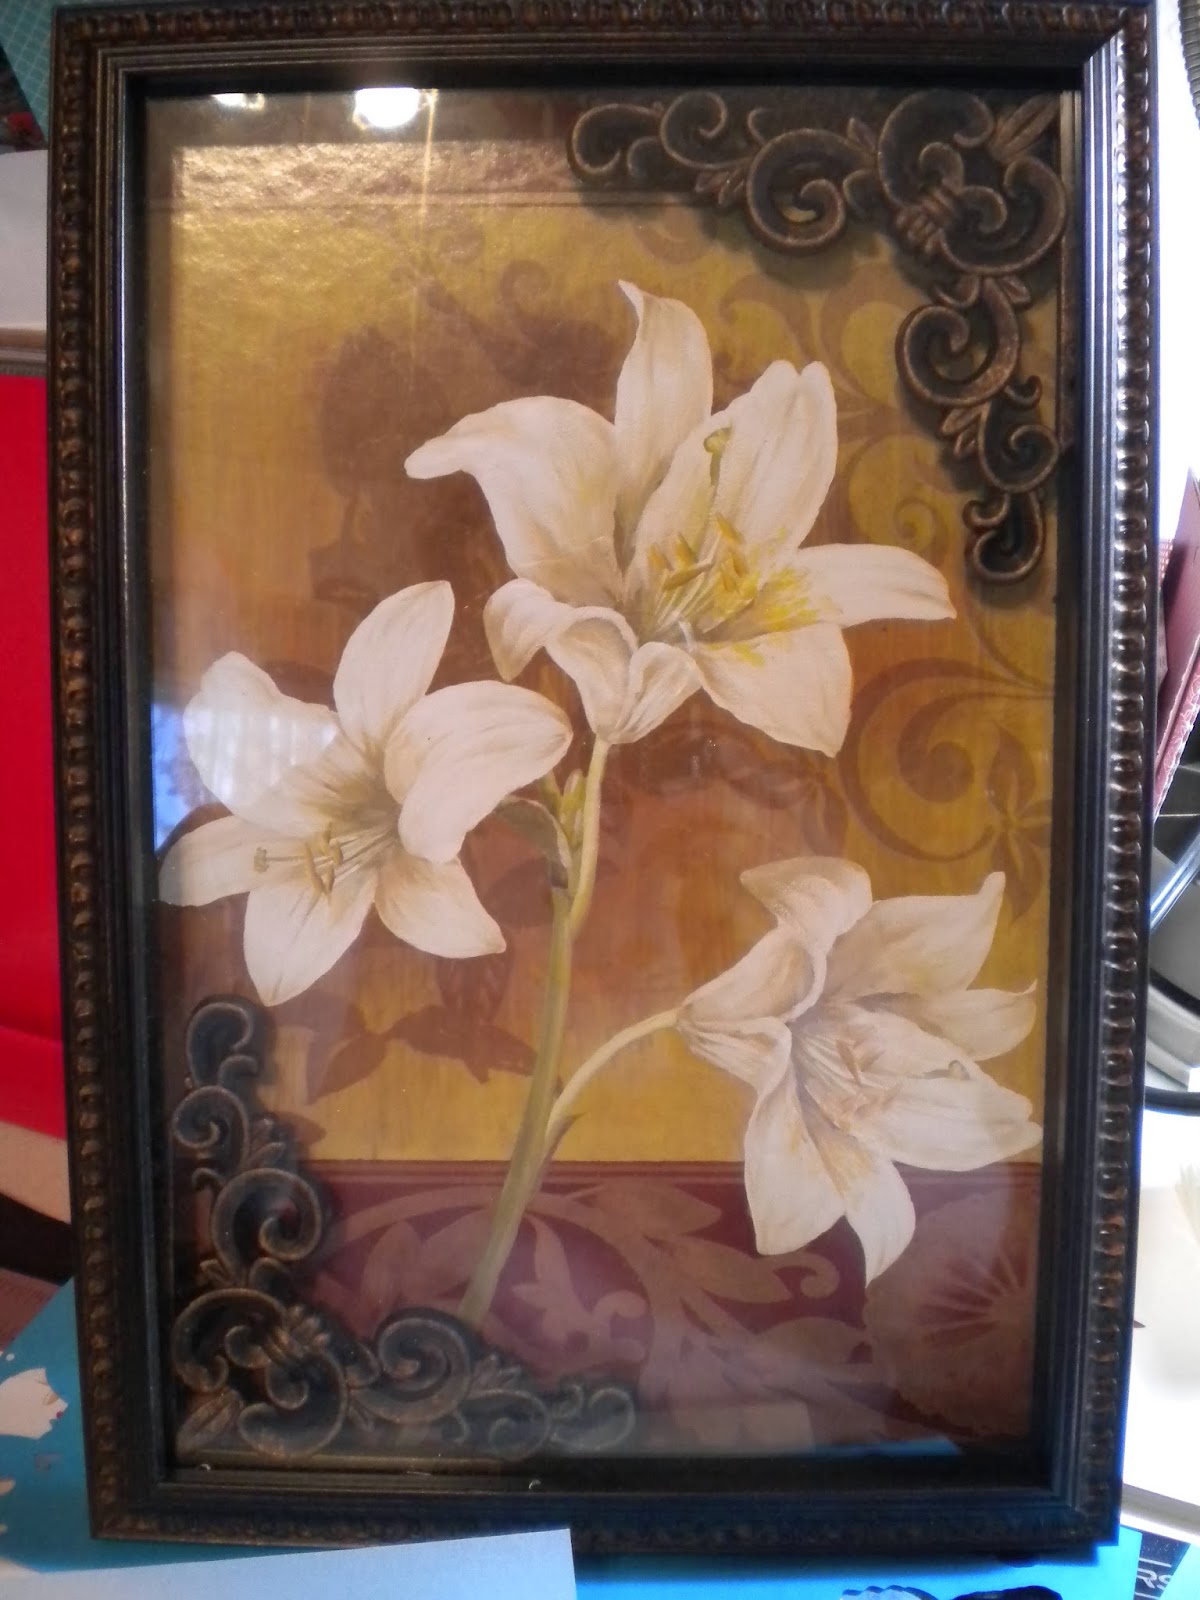
I covered the art work with a piece of pretty Tim Holtz paper using my ATG gun and double sided tape. The branch was clipped from a tree in our front yard. It had to be trimmed a bit to position it just where I wanted it inside the frame.

Once I was happy with where it was situated, I used an awl and punched a hole on either side of the branch and threaded some paddle wire through the holes to secure the branch in place.


I used a Cuttlebug die and folder, Martha Stewart punch and an EK Success punch for the butterflies..
This was made for my main bathroom but I have a feeling when my friend, Leonna, sees it, she'll wind up owning it. She loves butterflies more than I do!
Sunday, January 12, 2014
Stampin' Up Inspired Card
A Stampin' Up demonstrator pinned a card similar to this on Pinterest. I like the sentiment she used so I printed it in my card making software. Then I added a couple of flowers punched with an EK Success punch and a pretty brad from Eyelet Outlet.


I believe I prefer the second version better. No flowers and I dropped one of the pennant shapes down a little lower.

Saturday, January 11, 2014
Sunshine Card

Love U Card
Renee Wayland and her sweet sister drove to Ada and Shirley and I introduced them to our favorite LSS, Scraptopia. While we were shopping, I noticed a roll of printed tissue paper by Tim Holtz. The roll was huge so Renee and I divided it. I used the tissue paper for the background on this card.
The original card is from Miriam's blog Cards and Scrapping. She's a Stampin' Up demonstrator from another country and I can't read a single word of her posts! lol!
I've been using my Cameo for almost a year and today's the first time I've had any issues with it. Guess it doesn't like inactivity and resented not being used for over six weeks. I had a 12 x 12' sheet of cardstock on my mat and it decided to only cut half the images. After messing around with the blade, etc. for several minutes I gave up and put a new blade in and it's cutting just fine now.

The original card is from Miriam's blog Cards and Scrapping. She's a Stampin' Up demonstrator from another country and I can't read a single word of her posts! lol!
I've been using my Cameo for almost a year and today's the first time I've had any issues with it. Guess it doesn't like inactivity and resented not being used for over six weeks. I had a 12 x 12' sheet of cardstock on my mat and it decided to only cut half the images. After messing around with the blade, etc. for several minutes I gave up and put a new blade in and it's cutting just fine now.
It's Been A Long Month!
There is a very good reason why nothing has been posted on here since my automated posts on Christmas Eve. And, they wouldn't have posted if I hadn't set them up several weeks ahead. My husband had a serious fall on December 10th and just got home from the hospital and rehab yesterday.
I spent the last month driving back and forth to Midwest City to the skilled nursing facility where he received his physical therapy. It seems like I met myself coming and going. There was no time or energy to make any cards at all.
He's doing quite well so I sneaked back into my craft room to make a thank you note for the staff at the care facility. Guess card making is like riding a bicycle. It was a slow start but I managed to get this done.
 The colors don't show up well in the photo. They truly do match! lol! As soon as the Pearl Pen dots dry on the flowers, I'll jot a note inside and get it sent off.
I spent the last month driving back and forth to Midwest City to the skilled nursing facility where he received his physical therapy. It seems like I met myself coming and going. There was no time or energy to make any cards at all.
He's doing quite well so I sneaked back into my craft room to make a thank you note for the staff at the care facility. Guess card making is like riding a bicycle. It was a slow start but I managed to get this done.
Tuesday, December 24, 2013
Etched Casserole Dishes


Almost Floating Frames
A holiday catalog inspired me to make these frames. Since floating frames are rather expensive, I decided to just make my own.
All these frames came from either the Dollar Tree or Dollar General Store. The largest is 8" x 10" and the smallest is 4" x 6". I removed the cardboard backing and then put a line of hot glue around the edge of the glass on the back side to hold it in place.
The issue with removing the cardboard backing was that also removed the metal hanging loops. When I selected the frames I made certain the edge of the frame was wide enough to add my own sawtooth hanger.
The letters were cut from Oracal 651 vinyl and mounted on the surface of the glass rather than reversing the image and placing it on the back side of the glass. I did it this way so that none of the adhesive on the larger letters would be visible from the front.

All these frames came from either the Dollar Tree or Dollar General Store. The largest is 8" x 10" and the smallest is 4" x 6". I removed the cardboard backing and then put a line of hot glue around the edge of the glass on the back side to hold it in place.
The issue with removing the cardboard backing was that also removed the metal hanging loops. When I selected the frames I made certain the edge of the frame was wide enough to add my own sawtooth hanger.
The letters were cut from Oracal 651 vinyl and mounted on the surface of the glass rather than reversing the image and placing it on the back side of the glass. I did it this way so that none of the adhesive on the larger letters would be visible from the front.

Saturday, December 14, 2013
The 2103 Holiday Market
I haven't done a craft show in over12 years but my friend Shirley and I decided to do the Holiday Market in Ada this weekend. I've been working diligently for the past few months making items for the show. We had a decent crowd but sales were pretty light so I still have the majority of the items on hand.
It wasn't definite that I'd be able to participate since my husband took a fall this week and has some severe injuries. I thought about it and discussed it with him and decided to do the show. His recuperation is going to be lengthy and once he comes home from rehab, I'll be needed here 24/7 for a while.
 These are items Shirley made. Tic Tac containers, Ghirardelli chocolate boxes, Hershey's nugget tins and some cute embellished tins.
 Shirley also decorated Vin to Go cups with some really cute vinyl cutouts.
 These are floating frames and shadow boxes that I made and put vinyl lettering and images inside.
 I sandblasted ceramic coffee mugs with masculine designs, made some vinyl signs, post it note pad holders, and some little candy jars.
 These are fruit jar mugs, insulated tumblers and beer mugs that I sanblasted.
 I had a rack full of decorated charger plates and glass cutting boards.
 Glass blocks that I sandblasted or decorated with vinyl. I only made one cake carrier.
 A closer photo of the post it note holders.
 Another photo of the floating frames and shadowboxes.
The show was only open from 9:00 until 3:00 so it was a short day.
If you see anything in the photos that you might be interested in purchasing, just let me know. The sales were light and I have the majority of these items still on hand.
It wasn't definite that I'd be able to participate since my husband took a fall this week and has some severe injuries. I thought about it and discussed it with him and decided to do the show. His recuperation is going to be lengthy and once he comes home from rehab, I'll be needed here 24/7 for a while.


The show was only open from 9:00 until 3:00 so it was a short day.
If you see anything in the photos that you might be interested in purchasing, just let me know. The sales were light and I have the majority of these items still on hand.
Thursday, December 5, 2013
Cold Weather and Comfort Food
I'm not sure why cold, wintry weather causes me to want foods that I enjoyed as a child. Oklahoma is under a winter weather advisory for the next couple of days. It's grey, cloudy, and a mix of rain and sleet is coming down---and I had to have some home made tomato soup.
We don't get a lot of snow in Oklahoma. As a kid, when we did get enough snow to play in, my mother gave us "one trip out and one trip in". In other words, go play as long as you want, but you're not tracking snow in on the floors. We'd bundle up, go outside and make snowballs and attempt to make a snowman. We'd stay until we were frozen to the bone because we knew if we went inside she wouldn't allow us to go back out again.
I remember one particular snow day. We wanted to make snowballs, but had no gloves. I'm not sure if momma suggested this, or if we came up with the idea ourselves, but, we put socks on our hands to use like mittens. It probably was our brilliant idea. Cotton socks get wet really, really quickly when you're rolling snowballs and your hands are then encased in wet ice packs.
That day when we went inside, momma had a pot of tomato soup ready for our lunch. I can still smell the aroma of that soup. It's a good childhood memory, one I associate with being safe and warm at home.
Today is a perfect day for home made tomato soup. I made myself a small pan of it and finished every delicious drop for my lunch today.
Momma was a "from scratch" cook. She did keep canned cream soups on hand to make casseroles and once in a while we'd have cans of chicken noodle soup, but she didn't use a lot of convenience foods. When she put a meal on the table, it came from her hands, not a box or can.
If you've never had home made tomato soup, and you're a tomato soup fan, you don't know what you've been missing. Real tomato soup is nothing like the congealed, sweet, pink stuff in a can. You can still taste the tang of the tomato and it's not sweet at all.
I learned to make tomato soup by watching momma do it. There's no set in stone recipe. In my opinion, the best recipes are the ones you prepare by sight and tasting. Here's how my momma, and I, make tomato soup.
You'll need a small can of tomato juice, salt, pepper, baking soda and some sort of milk. You can use milk from a carton, canned milk, half and half or even heavy cream. My favorite is just milk from the carton but the cream or half and half will make it much richer.
Heat the tomato juice in a saucepan along with the spices until it comes to a boil. Then add a generous pinch of baking soda and stir well. The hot juice will immediately begin to foam. That's the baking soda neutralizing the acid in the tomato juice. If you don't use the soda, the milk will curdle when you add it.
Then add enough milk to your liking, lower the heat and simmer until it's heated through and through. Now, all you need to add is a grilled cheese sandwich and you'll have a wonderful meal!
 If you're making a large pot of the soup like the photo above, increase the amount of baking soda you add. Today I measured the amount I used for 2 cups of tomato juice. I added 1/4 tsp of baking soda and it was enough. Momma never measured hers with a measuring spoon, she'd take the handle of the spoon and dip it into the soda box. Whatever formed a mound on the tip of the handle was what went into the pan.
Heavy whipping cream is what I used to make my soup today. It made it super rich and satisfying and I enjoyed two bowls full!
We don't get a lot of snow in Oklahoma. As a kid, when we did get enough snow to play in, my mother gave us "one trip out and one trip in". In other words, go play as long as you want, but you're not tracking snow in on the floors. We'd bundle up, go outside and make snowballs and attempt to make a snowman. We'd stay until we were frozen to the bone because we knew if we went inside she wouldn't allow us to go back out again.
I remember one particular snow day. We wanted to make snowballs, but had no gloves. I'm not sure if momma suggested this, or if we came up with the idea ourselves, but, we put socks on our hands to use like mittens. It probably was our brilliant idea. Cotton socks get wet really, really quickly when you're rolling snowballs and your hands are then encased in wet ice packs.
That day when we went inside, momma had a pot of tomato soup ready for our lunch. I can still smell the aroma of that soup. It's a good childhood memory, one I associate with being safe and warm at home.
Today is a perfect day for home made tomato soup. I made myself a small pan of it and finished every delicious drop for my lunch today.
Momma was a "from scratch" cook. She did keep canned cream soups on hand to make casseroles and once in a while we'd have cans of chicken noodle soup, but she didn't use a lot of convenience foods. When she put a meal on the table, it came from her hands, not a box or can.
If you've never had home made tomato soup, and you're a tomato soup fan, you don't know what you've been missing. Real tomato soup is nothing like the congealed, sweet, pink stuff in a can. You can still taste the tang of the tomato and it's not sweet at all.
I learned to make tomato soup by watching momma do it. There's no set in stone recipe. In my opinion, the best recipes are the ones you prepare by sight and tasting. Here's how my momma, and I, make tomato soup.
You'll need a small can of tomato juice, salt, pepper, baking soda and some sort of milk. You can use milk from a carton, canned milk, half and half or even heavy cream. My favorite is just milk from the carton but the cream or half and half will make it much richer.
Heat the tomato juice in a saucepan along with the spices until it comes to a boil. Then add a generous pinch of baking soda and stir well. The hot juice will immediately begin to foam. That's the baking soda neutralizing the acid in the tomato juice. If you don't use the soda, the milk will curdle when you add it.
Then add enough milk to your liking, lower the heat and simmer until it's heated through and through. Now, all you need to add is a grilled cheese sandwich and you'll have a wonderful meal!
Heavy whipping cream is what I used to make my soup today. It made it super rich and satisfying and I enjoyed two bowls full!
Subscribe to:
Posts (Atom)