Showing posts with label Distress Ink. Show all posts

Monday, September 19, 2016

Triple Layered Mat Technique

I don't own a lot of oversized stamps and don't use them too often.  When I saw this technique I realized it would give me an opportunity to use one of them as well as the Distress Inks I have on hand.

Mat sizes:  3 1/2" x 4 3/4"
                   2 3/4" x 4"
                   2" x 3 1/4"

In order to keep the mats in place, I put a dot of ATG tape on each just to hold it while it was stamped.

I inked the entire 4 1/2" x 6" stamp and, with it laying with the inked side up, placed the mats onto the stamp.  That allowed me to select just the area of the image I wanted to use.

With the mats still layered, I used Tim Holtz Distress Inks to shade the image.  Then I separated the images and layered them with pop dots.


Tuesday, December 29, 2015

Black Cat on Fence Card

After embossing the tree, I inked it with Distress Ink and
colored the leaves with a Promarker.

The fence and cat are clip art images I traced and cut with my Silhouette.


Saturday, December 12, 2015

Butterfly Duo Die Card

A quick card using some Tim Holtz paper scraps and Distress ink to try out the Butterfly Duo die.

This is an A2 sized card.


Wednesday, November 7, 2012

Dragonfly Card

This card was seen at Stampingmathilda.     I followed her basic design but used card making software to print the images and sentiment rather than using a stamp.  The dragonfly is free clip art found online.

The next thing I did, was to measure the image and cut myself a mask for the width of the strip I wanted to sponge the ink into. 

This time I used Make The Cut software rather than Design Studio to cut my mask.  I'm gradually weaning myself off using Design Studio.  Make The Cut is quicker to use and now that I'm getting more confident with using it, I totally understand why so many people like it.

The outside dimension of the mask is 4 1/4" x 7".  It's the same width as an A2 card and slightly longer.  I secured the mask onto my cutting mat with a strip of tape to keep it in place.


The folded card was placed under the 2" x 5 3/4" opening and inked.  I needed the stencil opening to be slightly larger than the card so that I could ink all the way to the upper and lower edges.

The grid lines on the cutting mat helped me keep the card squared up with the opening.


Doing the distressed ink technique isn't difficult if you have the proper daubers.  I find the round fingertip daubers work better for me than the square wooden handled tool that Tim Holtz recommends.

Tuesday, August 7, 2012

Miss You Card

The images were stamped onto printed cardstock with Memento Rich Cocoa ink.  I punched out the clock faces and pop dotted them onto the card front for dimension.  I tore around the outside edge of the larger image and inked the torn edges.

The Tim Holtz washi tape was tinted with his line of distressing inks to blend in on the card front.

The inside sentiment says " Miss you all the time."


Monday, July 30, 2012

Collage Cards

 Another attempt at using some Tim Holtz distress inks and stamps to do collage cards.
 Some of the images were printed using card making software, some are TH stamps and others were pulled from various other stamp sets.
I added some paper tape on this one.
At one point, I had 15 Stampin' Up stamp cases- that I use to store my stamps in - out on the counter top looking for images to use!

I also used a couple of K& Co. embellishments.

This style of card is one that I really think is unique and mine just never seem "busy" enough when I get finished!  But, one of these days, I'll get one done that's just the way I want!

Tuesday, May 22, 2012

"Shell Phone" Card

This poor little thing gets reception on her "shell phone" like I do on my cell phone! Unfortunately, I catch myself saying "Can you hear me now?" way too often!

 The phone images and the photo are clip art, the patterned paper is Graphic 45.  I used Tim Holtz paper and die to cut the scalloped border and Distress Ink on the photo and background paper.

I realized, after assembling this, that I should have printed the phones all over an entire sheet of paper so that they'd not just be hanging in space.  Oh, well! Back to the drawing board!


Wednesday, February 15, 2012

Card Experiment

Someone pinned this card by Heather Nichols.  Heather Nichols

I decided to make my own version of her concept.  There are four different layouts of the same card.

For this one, I printed clip art butterflies directly onto the paper
I chose for the card base.  Then I used distress ink for the shadow.

Nothing really wrong with this, it's just too one dimensional.


Three of the butterflies are printed onto the card base and the fourth one is cut out and pop dotted for dimension.

This one is better.


For this one, I laid the butterflies onto the base paper and created the shadow, then glued the butterflies onto the base paper.

I like the cut outs on the card better than the ones printed directly onto the paper but they're still too flat.


For this one, I laid the butterflies onto the card base and inked the shadow.  Then I pop dotted each of the butterflies so that you can barely see the area underneath them that has no ink.

This is the one that I like the best.

Friday, June 24, 2011

Butterfly Cards

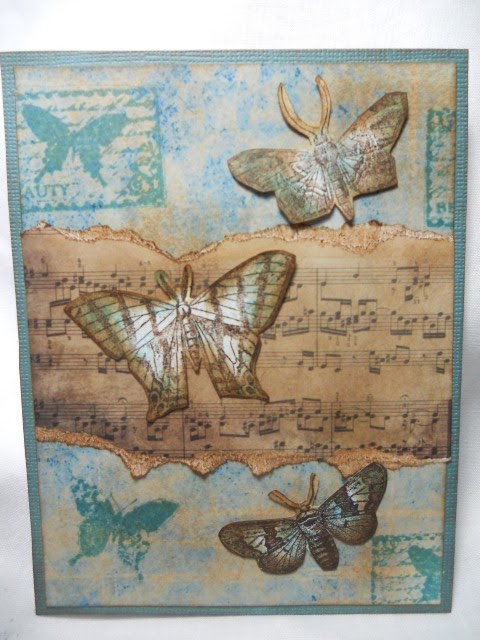
The butterflies on these are from a collection of Tim Holtz stickers that I purchased a few weeks ago.  I made a color copy of them and then inked them with TH Broken China Distress Ink using a sponge dauber and cut them out by hand.  Doing the copy onto cardstock took away the shiny surface that was on the stickers; that's a look that I didn't want on these cards.

The cardstock I used is also Tim Holtz, it was distressed with Vintage Photo ink.  The stamped butterflies are done with the same ink.

Wish you could see these in person, I think they're some of the prettiest cards I've made in some time!


I love the papers in the Tim Holtz stacks.  It's hard for me to use it though--because once I do, it's gone!  But I'd seen some cards at And Bear Makes Three in Norman, OK that inspired me to "sacrifice" some of it!